Practice 0: Intro to Maya/Arnold First Class
CS22/122. Loeb
In this class we use Maya to build our 3d models and a software package called Arnold to add materials and render that object.
Arnold tries recreate the physical world and is a very powerful and fast renderer.
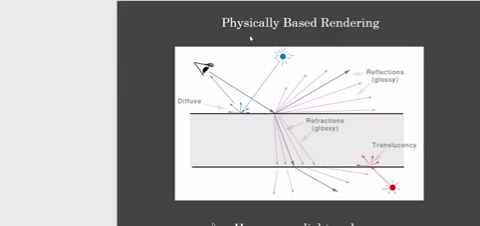
When you look at an object, we see it because there is light in the environment. If it is pitch dark, nothing is visible. As we add light, objects become visible and our eyes/brain starts to make out the shape and also the kind of material and quality of light. We learn the object by the way the light bounces off that object.
This exercise will let you play a bit with the materials we put onto objects in order to see how cool Arnold is and get a feel for the process.
The first thing you notice when you look at an object is usually the color.
You might notice the highlights that make an object look shiny (caused by light refractions)


You also notice the reflections, when the surface reflects the world back to our eyes:
And the light might go through the object, making it look transparent or translucent (called transmissive).
![]()
Set up your computer a bit
To make Maya projects easier to find in the future
If you are working on a Mac:
- Open the Finder on your Mac.
Most of you should see the "projects" folder in the favorites section on the left of the finder.
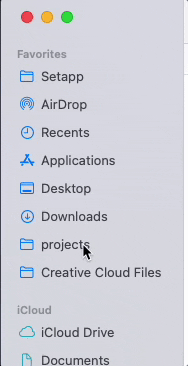
If you don't, here is how you put that shortcut in your finder:
- In the Documents Folder go to Maya>projects
- Drag the projects folder to the sidebar of the Finder under Favorites as shown above.
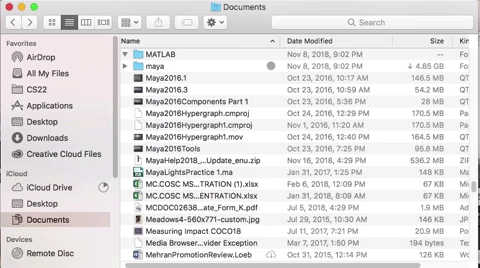
- You want to drag it so that a line shows in the sidebar creating space for this new folder. Don't add the projects to another folder!
This creates a shortcut for finding your project folder.
If you are working on one of the Windows Machines,
There is a shortcut to the "projects" folder on the desktop in a folder marked "CS22/122".
Let's play around and see how that works!
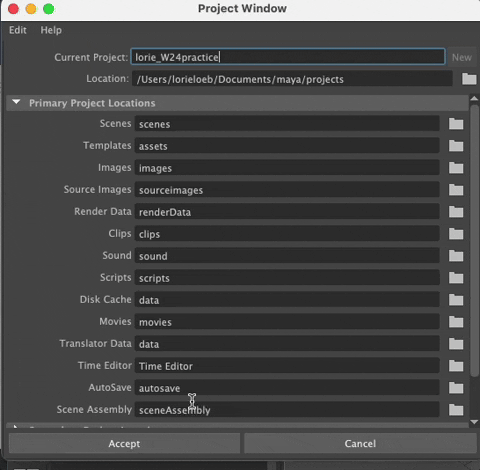
Before we can work in Maya, we need to set up a project.
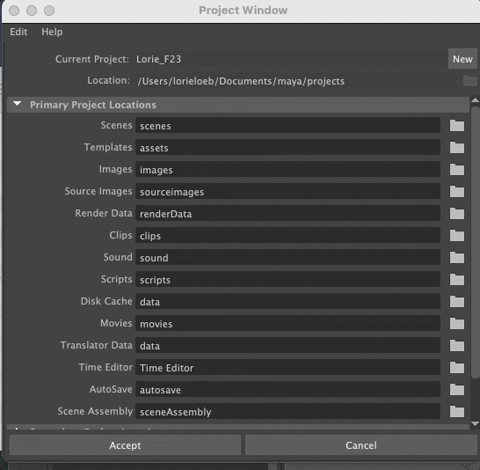
In Maya, Go to the Main Menu (at the top of the UI, and choose File>Project Window
A new window opens called Project Window. Yours will probably say "default" as the current project name.
- Click on the New button to the right of the current project. Create a new project called yourname_Practice.
Be sure to use your name in a way that others will know who the file belongs to (there are a lot of us in the class).
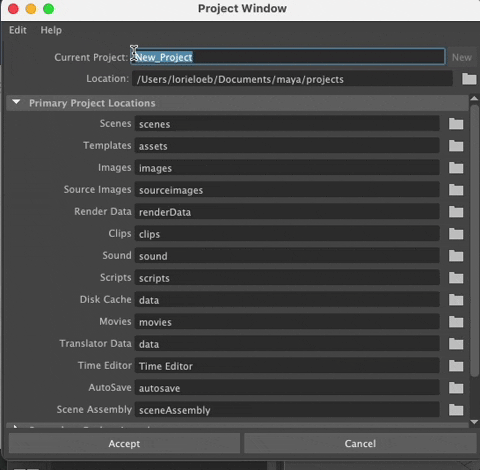
The subfolders created by default are fine for this class.
- Hit Accept
This is where you will put all the work we do during class that isn't related to your personal class project work (room, abstract, biped). You will create new projects for each of the three major class assignments when you start them.
Fetch files we need for the in-class work from the Google Drive "Files to Download for Class" folder.
I've created a class Google Folder where you will turn in your assignments, get files you need for in-class workshops/exercises, and find lecture slides from class.
You can find the Class folder on the class website by navigating to the google drive links
which take you to the class google drive folder:
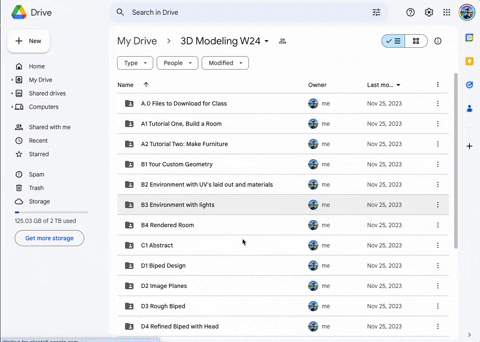
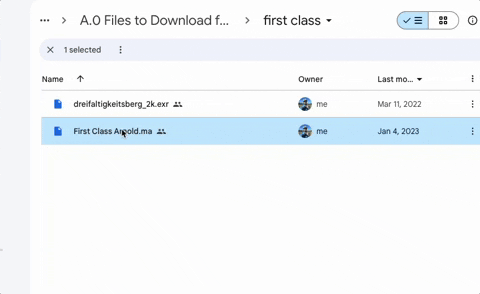
Navigate to the Files to A.0 Download For Class Folder
- Download the two files inside first class folder
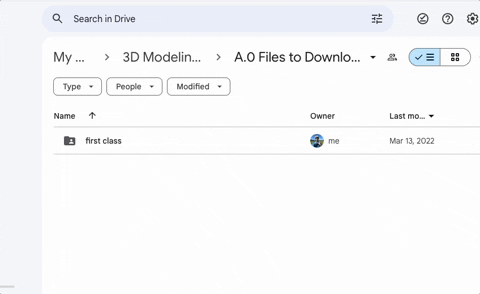
- In the first class folder, you will find
- A file named First Class Arnold.ma
- dreifaltigkeitsberg_2k.exr
Download the First Class Artnold.ma file into the scenes folder within your Practice project. The most efficient way to do that is to download each file directly to the proper folder in the project folder.
Navigate to the scenes folder and hit save
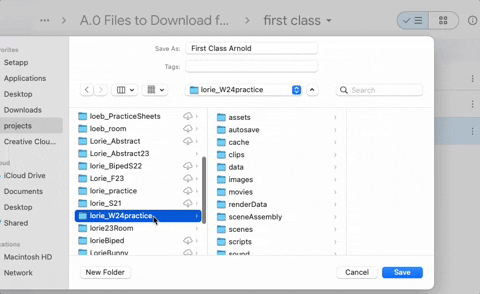
Save the .exr image into the sourceimages folder for your Practice project.
It is critical that you work with your files organized correctly or you will run into problems with texturing and rendering. Never use a project directly off the desktop.
Open the Scenes Folder (Directory) and double click on the PracticeSheet0.mb file to open it in Maya.
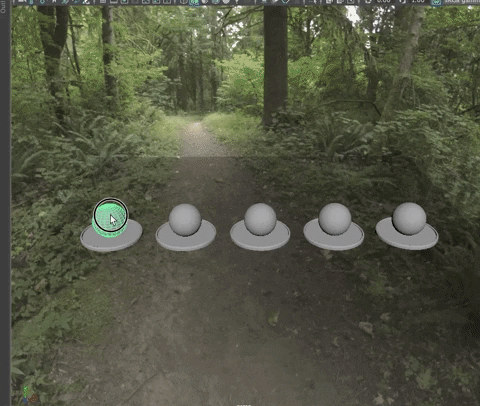
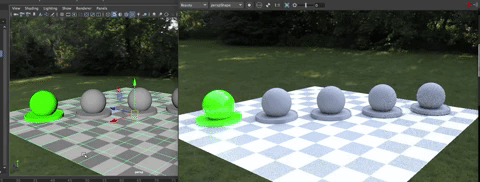
Your view panel should show some spheres and bases on a checkerboard plane.
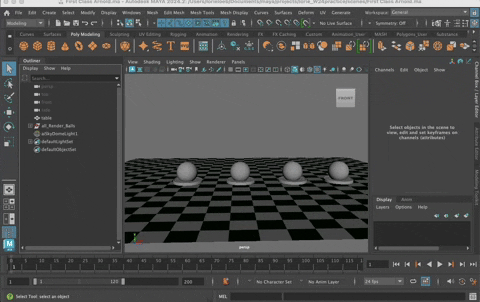
Change the workspace: move from the general workspace to the Modeling - Standard Workspace

Note: If your viewpanel gets funky, showing only a portion of the scene,
it is because you are working with two monitors. Move the workspace to the main monitor and back and it should reset. This sometimes happens when changing workspaces with two monitors, but it is easy to fix (btw: I spent hours trying to fix it before I figured out the issue...)
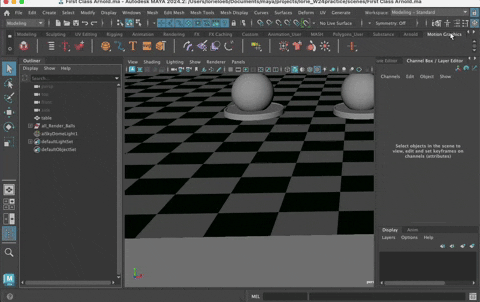
Here is what your are looking at in this scene:
- five polgon spheres on polygon bases
- a plane with a checkerboard texture on it
- an aiSkydome light (creates a giant sphere with white light shining in from all sides--you can zoom out to see it).
Check it out: Zoom out (use the scroll wheel on your mouse) and you will see that the scene is inside a large sphere, called an Arnold SkyDome Light
Scroll back in so the scene is as it was or use a trick by hitting the "open bracket key" [ which moves through the camera views you have used since your last save. You may need to click off the sphere and into the viewport to have this work.
Another navigation trick is to select an object, say one of the spheres, and hit the "f" key to frame in on that object.
NOTE: The "f" key is a keyboard shortcut to "frame selected". The "a" key is a keyboard shortcut for "frame all" which displays all the objects in the scene.
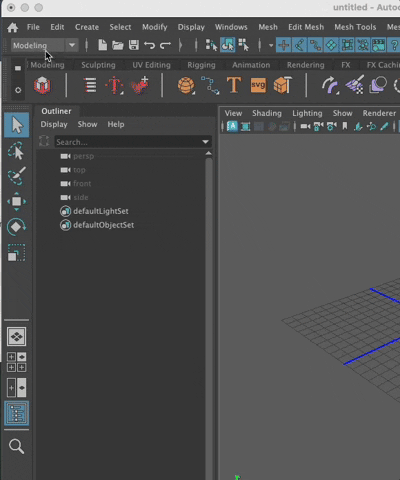
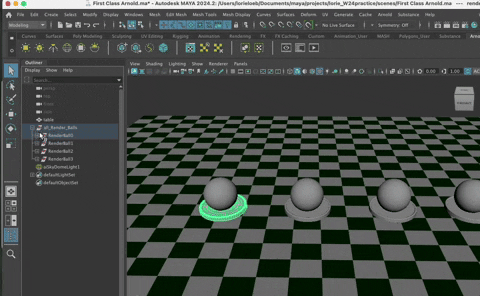
#The Outliner Window
(if it isn't showing go to Windows>Outliner to open it) shows all the objects in your scene. This is a very useful window to use.
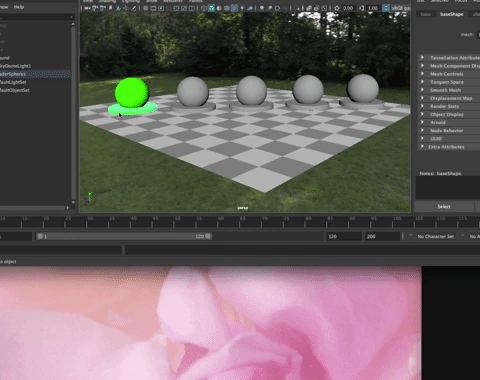
I created a group called assets with the spheres and tabletop, and a subgroup called spheres and bases. Click on the plus signs by the group name and it opens up the objects in the group.
aiSurfaceShader
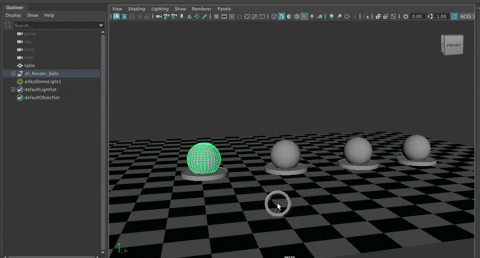
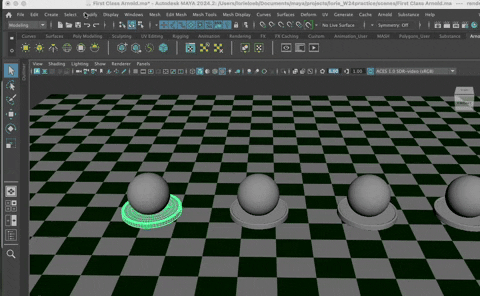
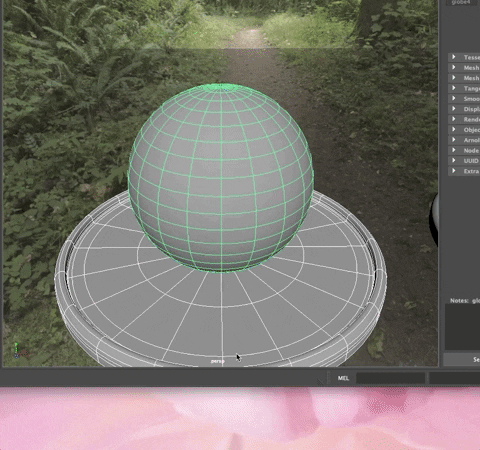
- Select the left-most sphere and hit "f" to frame up on it.
- Hit the "3" key to smooth the object in the viewer.
- Select the base and shift select the sphere as shown above.
- Objects that are selected are white. The last selected object is green.
###Our goal is to assign new materials (shaders) to the spheres and bases to play around with what Arnold (our rendering software) can do.
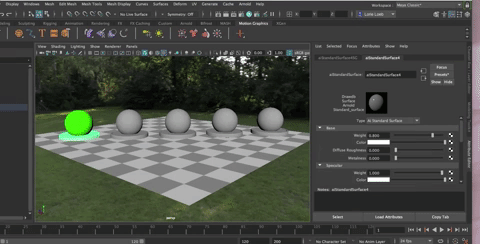
By default, when you create an object it has a flat shader (no highlights) called a lambert. We want a material (I will use the term material and shader interchangeably) that has more interest.
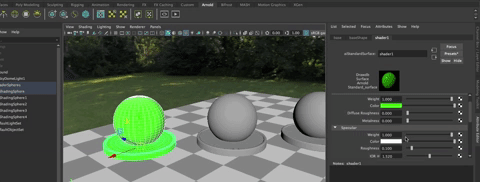
First, assign a new material.
- RMB click on the sphere and go to Assign New Material
- This opens a new window.
- Choose Arnold>Shader
- Choose aiStandardSurface
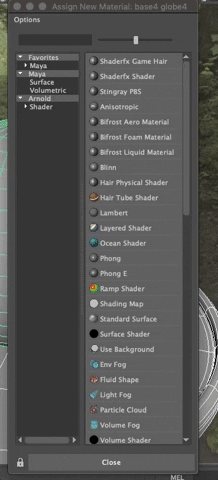
This replaces the default shader with the aiStandardSurface shader on all selected objects. In this case, the sphere and base. Both objects now have the same shader, so if you change the shader settings on one, it changes it for the other.
- Open the Attribute Window
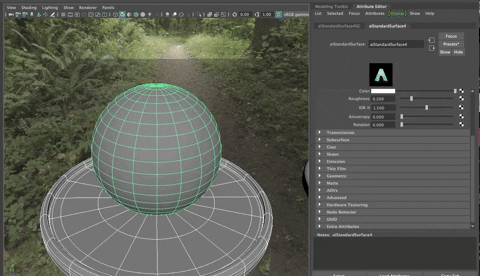
- Under Base, change the color by clicking in the color box and selecting any color you'd like.
You will notice that the ViewPort window updates with the new color, and the color is on both the sphere and the base as would be expected.
- Make the weight 1.0 (100%) For some reason, the default is always .8 or 80%.
- Deslect the sphere and base to see how it looks.
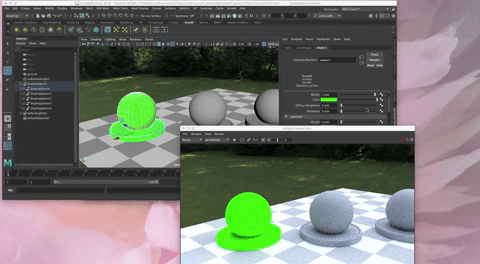
Let's do a render to see how it looks.
In the Arnold shelf, click the Render IPR button. It may take a moment to open.
The nice thing about the Arnold Render IPR window is that it updates as you move around in the Viewport.
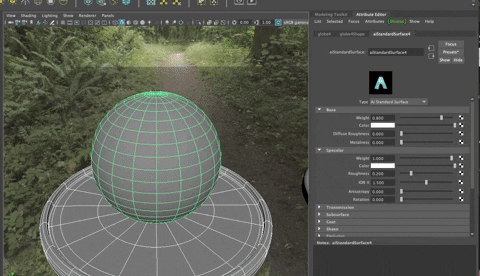
You will also notice that the sphere and base are pretty shiny, they have a lot of specular highlights. Let's make it a flat color.
- Turn the Specular weight down to 0
See the difference in render view?
Diffuse Roughness (under color in the Attribute Editor) spreads the color around a bit so it has a bit more, well, roughness. You can play with that a bit to see the difference.
Next in the Attribute Editor is Metalness. Metalness makes the color more metal-like. It can be confused with reflection, but they are different in that this isn't adjusting the reflection, it is adjusting the quality of the base color itself. Still, it makes the material quite shiny and reflective.
Try turning up Metalness
This makes it look like polished metal or a Christmas tree ornament.
The Diffuse Roughness is at 0 and grayed out when the Metalness is at 1.0. You can play around with decreasing the Metalness attribute value and increasing roughness. This makes it more of a matte metal finish.
Let's make the base a different color. Select it. Right click on it, but this time, choose "Assign New Material"
The Assign New Material window opens. Under Arnold, choose Shader and then aiStandardSurface.
Repeat the steps above but choose aiStandardSurface4 tab in the Attribute Editor (or whatever number it is in your scene) and change that color, make it's weight 1.0.
This is a good time to SAVE!!! Hit Command + s
A good rule of thumb is to either have Auto Save on, or to just remember to save often, particularly if you've done enough work that it would be painful to lose it!
Using aiStandardSurface Shader and the Specularity Settings
Select ShadingSphere1 group (sphere and base) and assign a new material. Again, choose Arnold>Shader>aiStandardSurface. In the attribute editor, rename this material to M_specularity
aiStandardSurface is super flexible and can act much like a large number of materials, from wax to chrome, to glass. I will go into more detail on how shaders work, refraction, reflection, and transmission soon, but for now, let's just play. Specularity, simply put, is the way light bounces off an object's surface material.
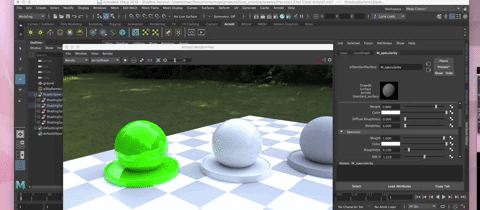
- Turn all the attribute value settings in the Base section of the material Attribute Editor to "0".
- The object has no base color now.
- It only has specular attributes.
- Let's adjust those to see what happens.
The sphere is black and has specular highlights.
- Start by reducing the Specular Weight.
At it looks like a flat black sphere.
Put the weight back to 1.0
- Try changing the color of the specular highlight to something bright like yellow.
You may start noticing that the highlights are more yellow, especially around ridges along the base. If you can't see it, try turning the view in the ViewPort
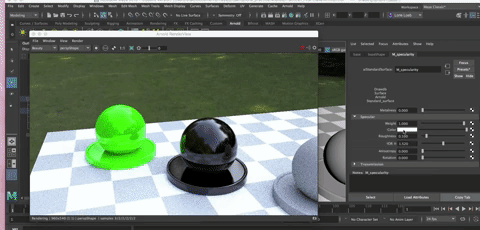
The reflections you see are not based on the color but are strictly influenced by the specular algorithms in the shader material. In real life, we can't separate out shading attributes like this, so it can be a bit confusing.
Roughness in specularity is at .1 by default (10%). The rougher it is the more it looks like a matte finish, and at a specular roughness of 1.0 it is practically flat.
IOR stands for the Index of Refraction or Fresnel effect. A Fresnel lens focuses the light so it is seen differently from different sides. You can see this in a window. From straight on you only see out the window but from the side you often just see the reflection of the room. IOR is based on real life materials and you can find the actual IOR for various materials online at sites such as this.
Anisotropy makes the specualrity into bands like a CD that has ridges. You can play with that. Rotation, rotates the direction of the "ridges".
Play around with changing both the color, the metalness, and the specular highlight color to see what sorts of things you can create.
Transmission
Transmission is light that passes through an object, making it look translucent or transparent.
Assign a new material (aiStandardSurface) to the next sphere and base.
- Rename the material to M_transmission
Leave everything at the standard settings and go to the Transmission Tab.
- Change the Weight to make it a bigger number, even to 1.0 (100%)
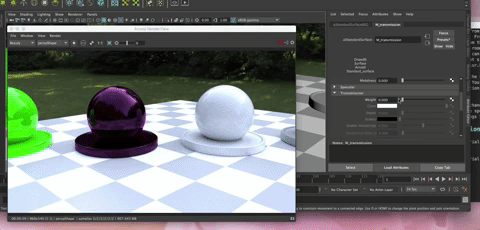
It becomes clear but it looks funky.
In Arnold, in order for a transparent object to render well, you need to change another setting on the object itself.
In the Attribute Editor for the object gemoetry, to into the sphere shap and the Arnold Tab.
Uncheck Opaque
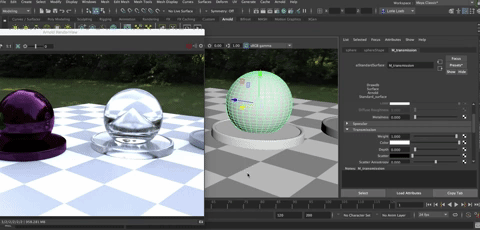
You need to turn off opaque for every object that you want to have transmission.
You can play a bit with the scatter, depth and anisotropy if you'd like to see how those work.
Presets
Arnold has some preset settings to help you simulate various materials in one easy step. Let's try it.
Assign a new material to the next sphere and base to the right.
Name it M_presets
To the right of the name is a Presets Tab. Select it, choose a material from the drop down list and replace. See what happens.
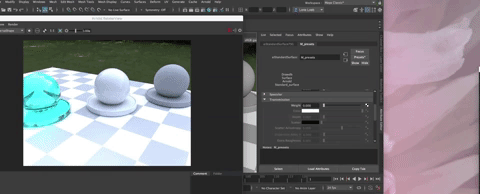
Very cool stuff, eh?