Tutorial_Animation Basics for CS22
CS22 Loeb
Here are a few basics of animation to help you animate your character.
What is animation on Maya?
Animation happens when an attribute value changes over time. We've seen, with Set Driven Keys, that an attribute value can be driven by another attribute value.
We will now drive the value change with time.
In order to change the attribute value, you need to have at least two values that happen over time.
Start by changing the workspace to Animation

This opens the Outliner, one viewport (perspective), the Graph Editor and Time Editor, the Time Slider and Range Slider, and Channel Box.
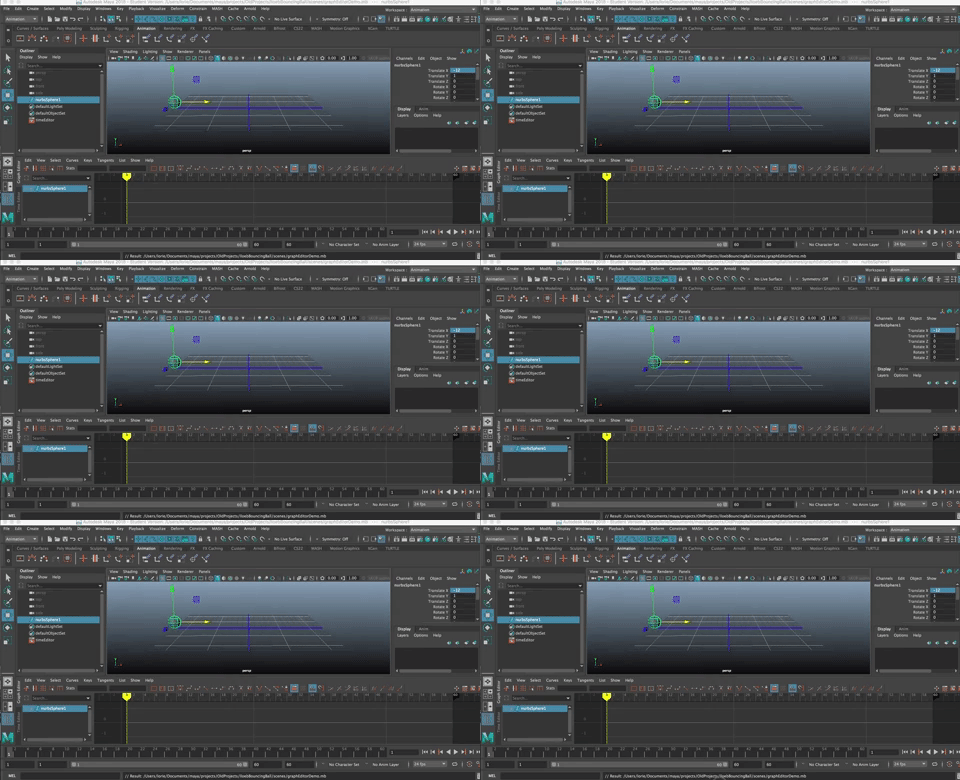
For this example, I've set up a sphere (S1) and put it a -12 in the X axis, 0 Y, 0 Z. You can create your own, or download the animation practice folder and open animationDemo.mb
We'll do a simple animation of the sphere moving across from -12 in X to +12 in X.
You MUST first set a key at the first frame of the animation. In this case it is Frame 1
About the Time Slider and Range Slider
The Time slider is the window at the bottom of the Maya UI that shows which frame you are on.
There is a dark gray line that shows which frame that is showing in the viewport.
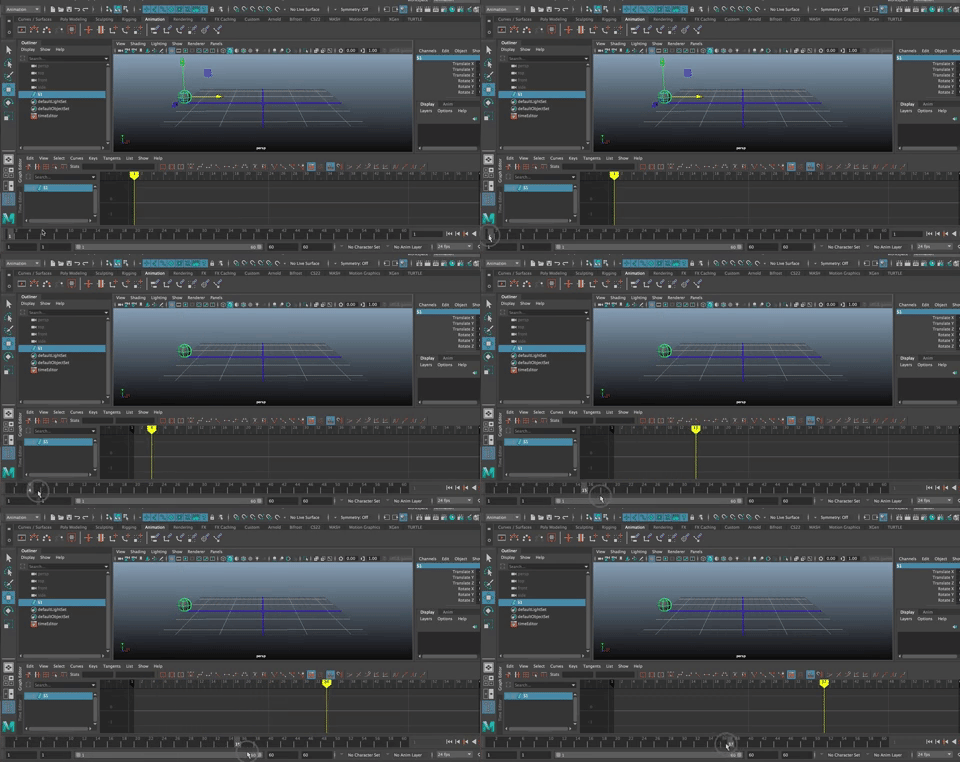
You can click and drag through the time line to advance to new frames.
In the animation workspace, the Graph Editor is right above the timeline and you can see the yellow frame indicator moves with the change.
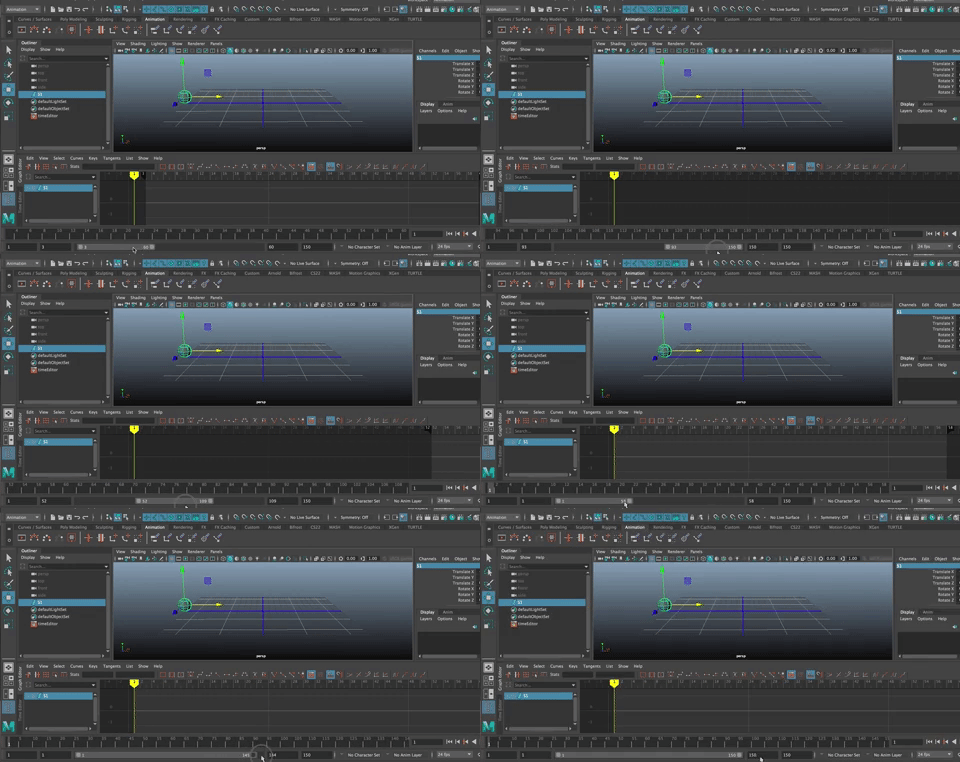
There are two numbers on either side of the Range Slider.
The first number on the left and last number on the right show the frames in the scene.

The middle two numbers show the range of frames showing at this time. You can drag the range slider from left to right to change the frames showing in the Time Slider.
You can also expand that range.
Make sure the animation will play back at either 24 or 30 fps (depending on the settings) by right clicking in the timeline and choosing Playback Speed>Realtime

Setting Keys
In Maya, you set the key frames and the program figures out the way the frames in-between are interpolated.
Let's try it...
Select S1 in Object mode
Be sure you are on Frame 1 in the Time Slider.
Hit the "s" key to set a key frame in whichever attribute values are showing in the Channel Box.
The default attributes are Translate (x, y, z), Rotate (x, y, z), Scale (x, y, z), and Visibility (on/off).
NOTE: If you created a custom attribute value or locked and hid any attributes, there will be a different set of attributes in the Channel Box.
Hit "s"
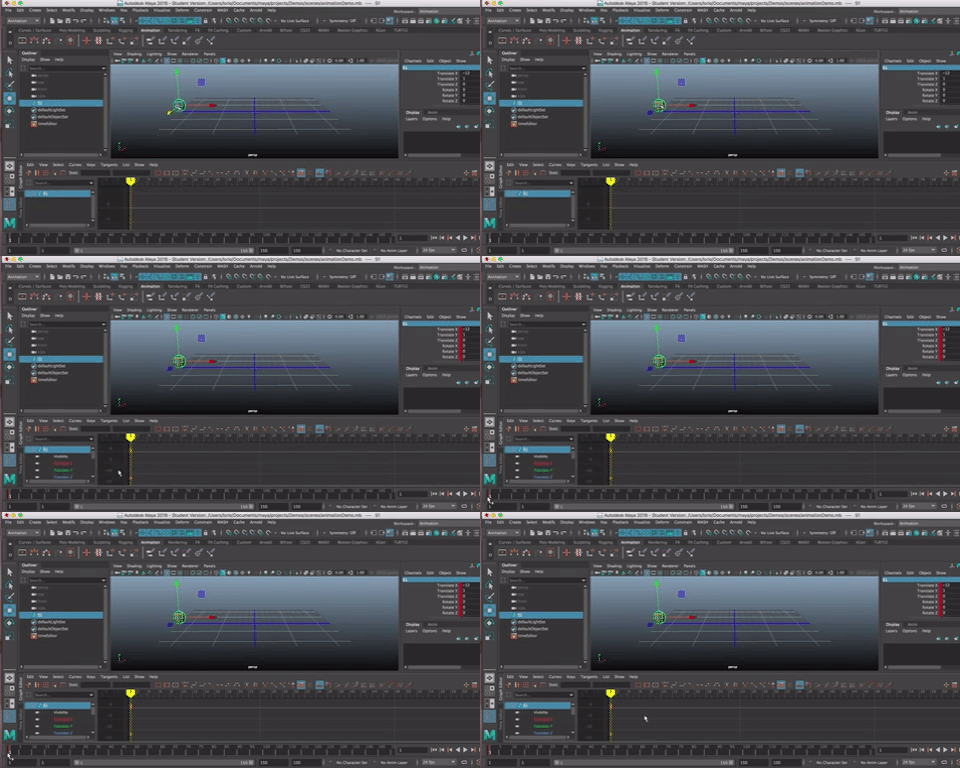
You will see a red tick line in frame 1 of the Time Slider to indicate there is a key there.
You will also see a red line between the attribute and its value in the Channel Box.
Remember: You have to set keys at least two frames on the attribute (with different values) in order to create an animation!
Let's set a second key.
Go to frame 40 in the time slider.
Move (translate) the sphere to +12 in the x axis.
Hit "s"

You will notice a second red tick mark in the Time Slider and a red curve in the Graph Editor.
Rewind by hitting the double back buttons to the right of the Time Slider.
Then, Hit the Play Button
The animation plays for the number of frames in the range slider.
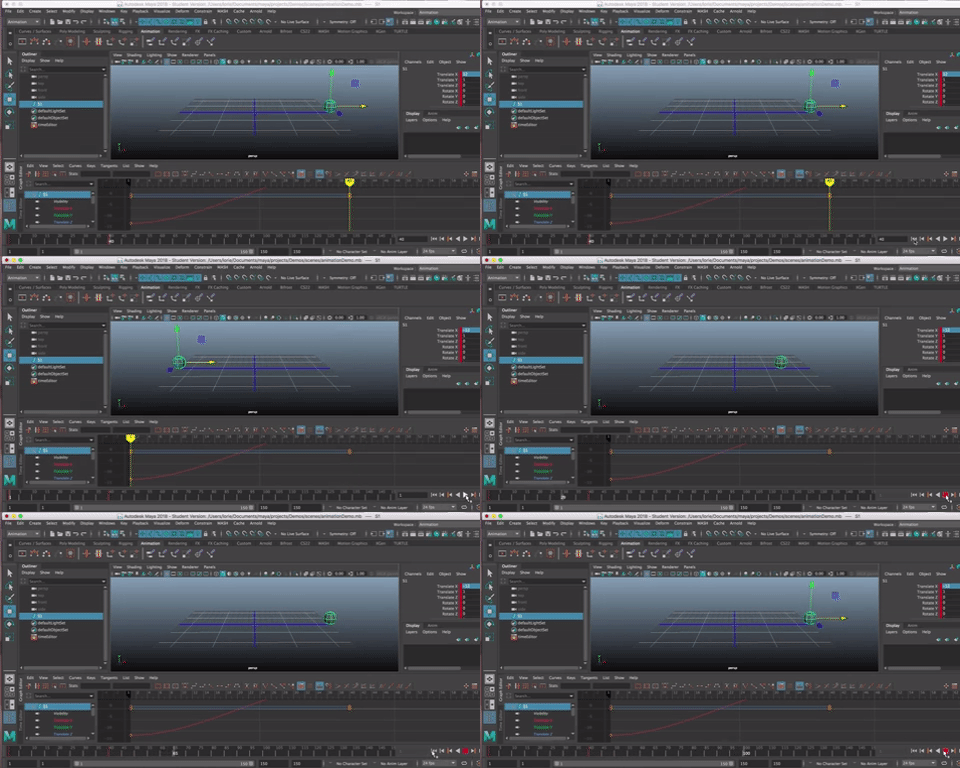
The sphere slides along the x axis.
Let's look at what that looks like in the Graph Editor
Intro to the Graph Editor
I'll expand out the Graph Editor to take a better look.
On the left are the attributes that have been keyed (by hitting "s" we set keys on all the attributes in the channel box)
You can select each attribute individually to see the graph, and hit "f" to frame up on it.
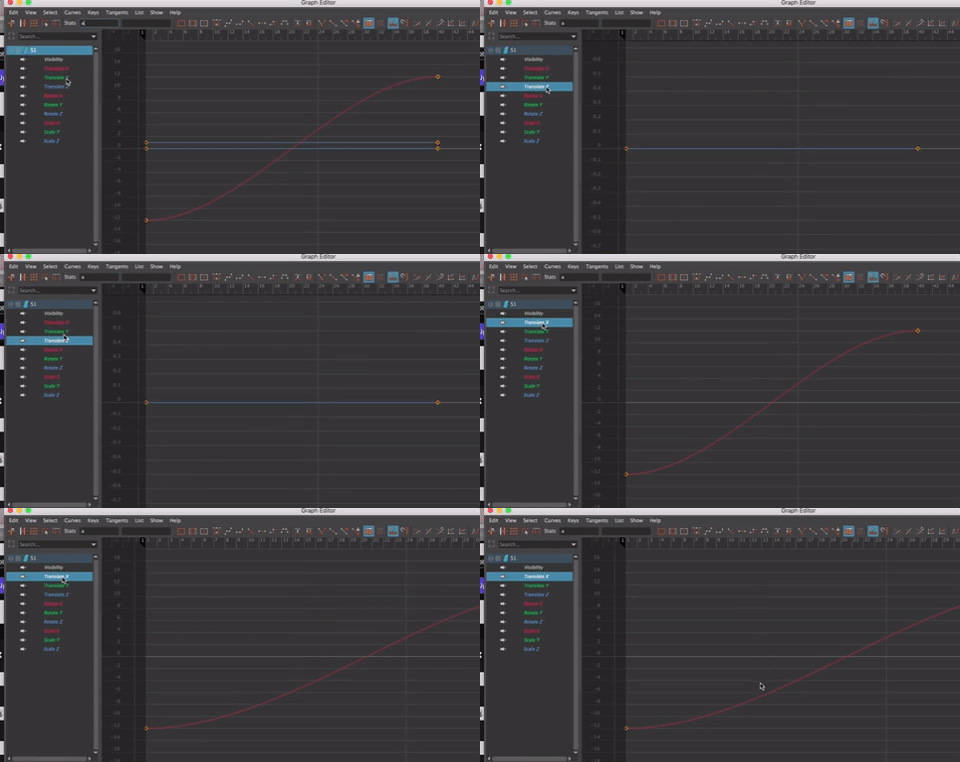
The only attribute value that changed was Translate X.
You will see this in the graph editor. At frame 1 Translate X value is -12 and at frame 40 it is +12.
Click in the window to bring up the time slider which scrolls through the frames.
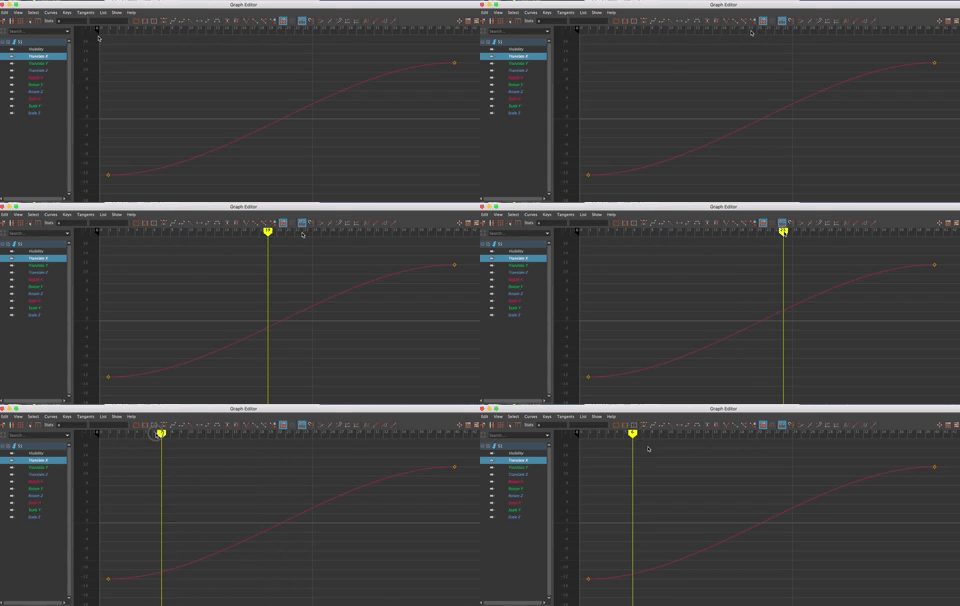
The viewport updates as you move the yellow bar.
You could keep going with the animation and add new keys.
Let's try it
Make a bouncing ball.
We want the ball to be in the air at a value of +5 in Y at frames 10 and 30.
We already have keys on Translate Y at frames 1 and 40 at a value of 0
Move the time slider to frame 10. Change the value of Translate Y. Set a Key by hitting "s"
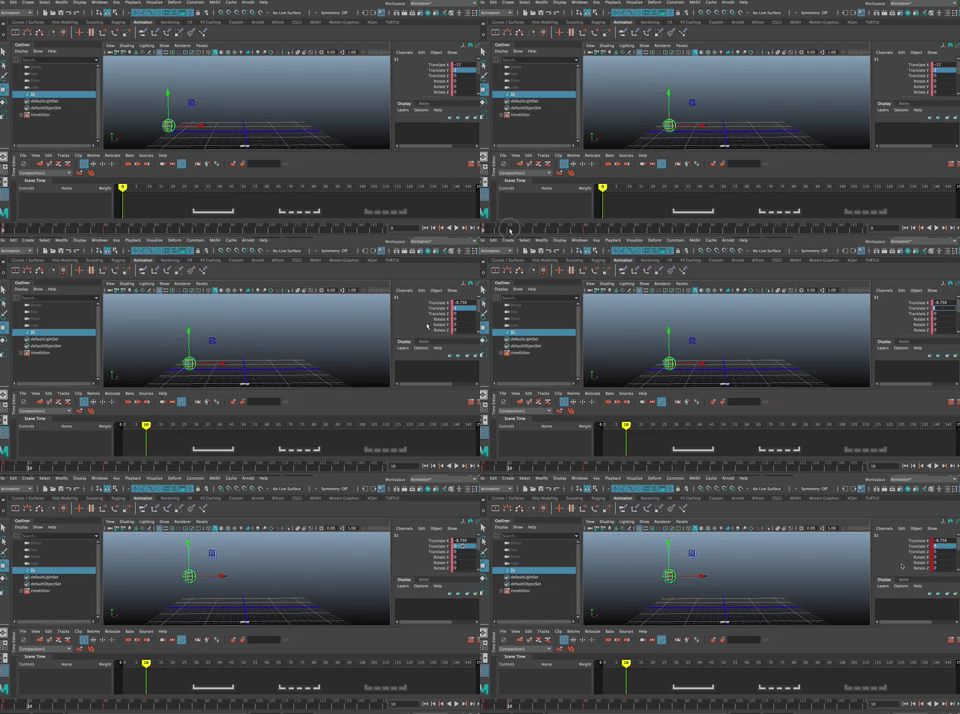
Then, on frame 30, do the same thing
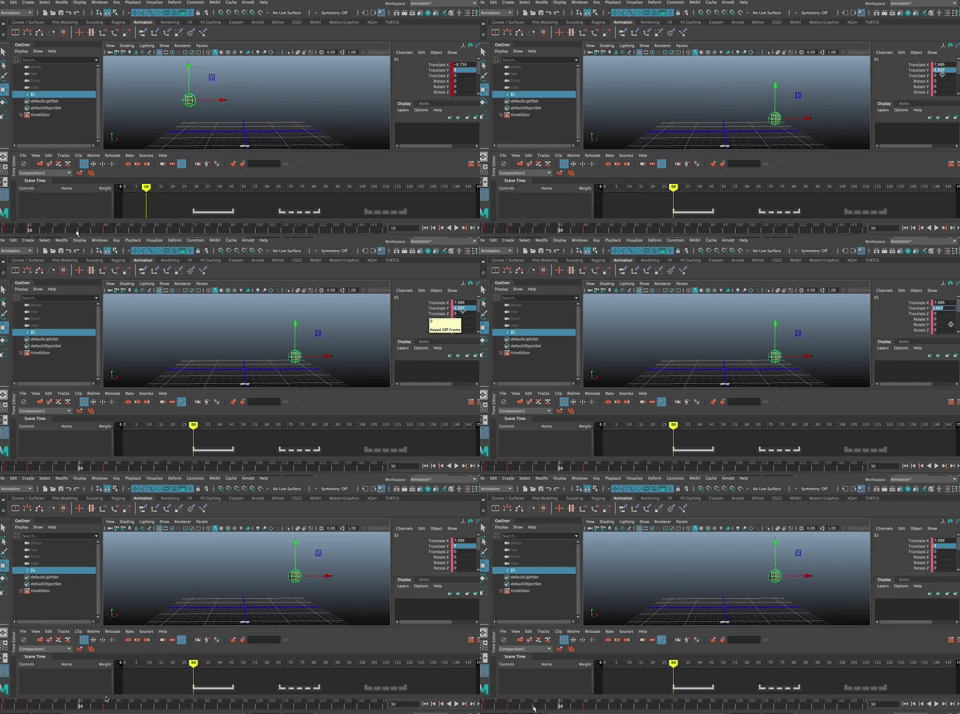
Play the animation.
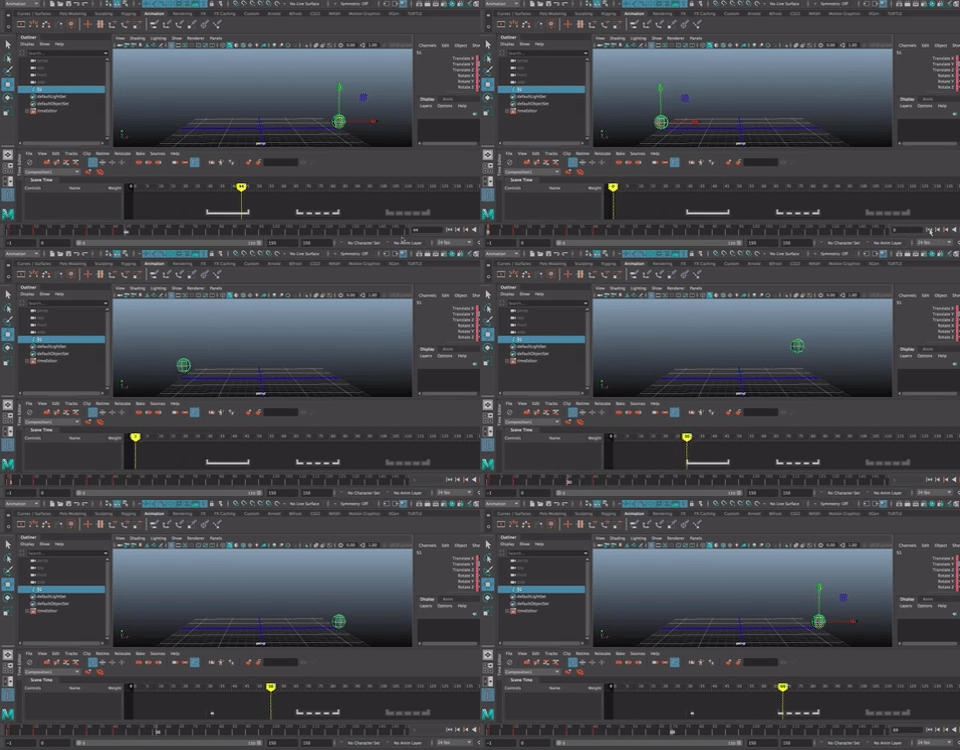
The ball starts at the ground, moves up, stays in the air and then comes back down.
Look at the graph editor.
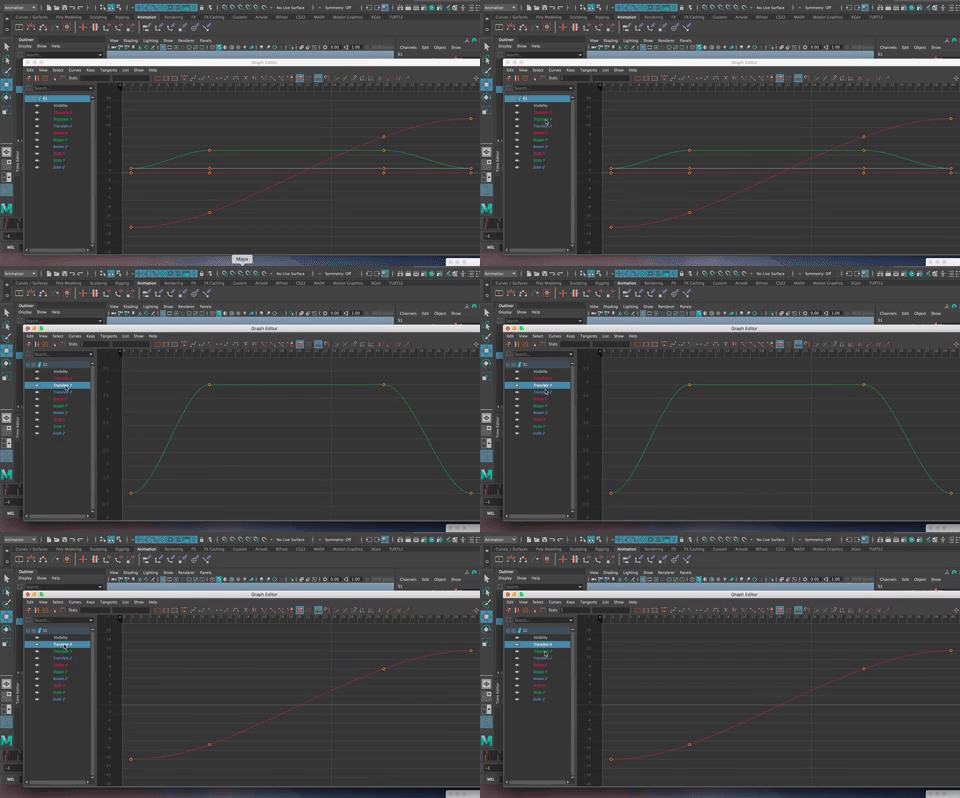
Choose translate Y and hit the f key to frame up on it. The graph shows the attribute values making the exact same path as the animation of the sphere.
If you scrub through the graph editor you will see this.
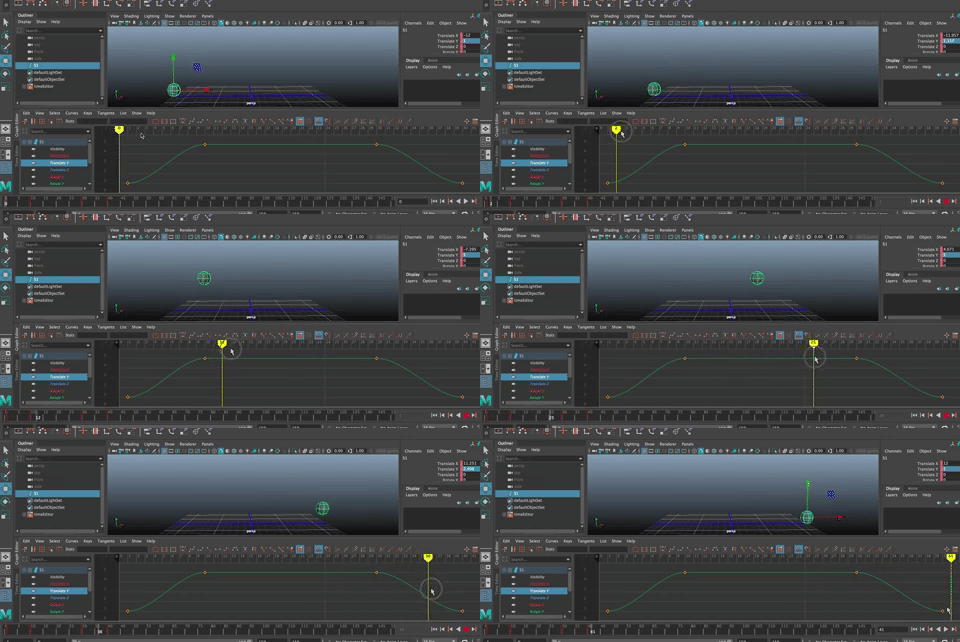
Tangents
You will also notice that there is a slight curve to the uphill part of the graph editor (between frame 1 and 10 and to the down hill (between frames 30 and 40). Also notice that the line is pretty straight between frames 10 and 30, making the translate Y value fairly constant.
Maya, by default, interpolates the changes in each frame between the keys to add a bit of easing in and easing out to every motion.
You can change the way Maya calculates the changes between keys by changing the kind of tangent you use.
Select the curve in the graph editor and change the tangent type from Auto to Spline.
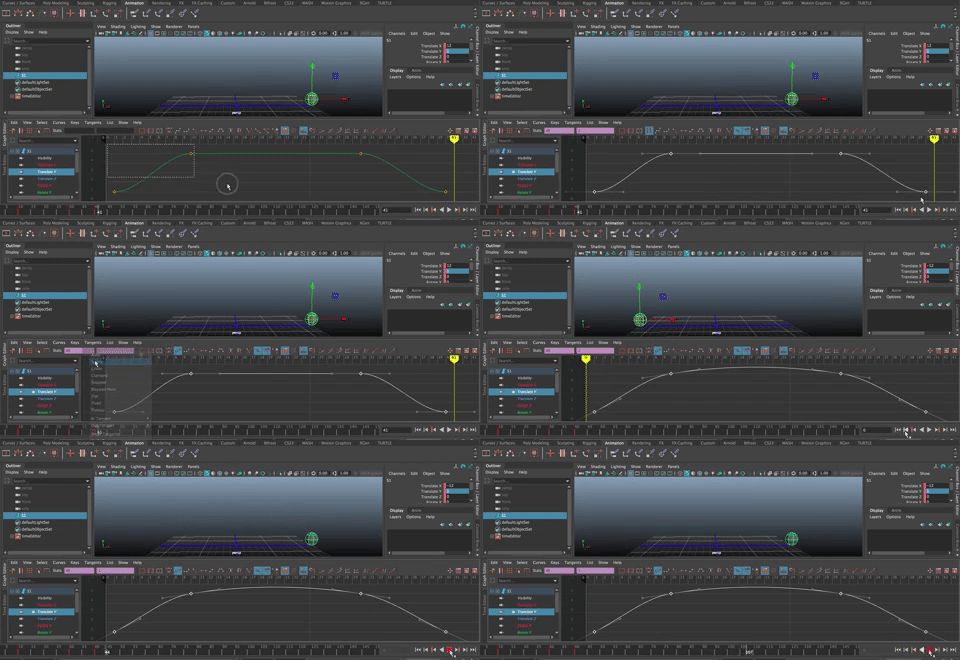
Notice the way a spline tangent creates even more of a curve before and after each key frame. This makes the acceleration and deceleration of the sphere more gradual and creates an arc in the air.
Select the curve again and change the tangent type to linear.
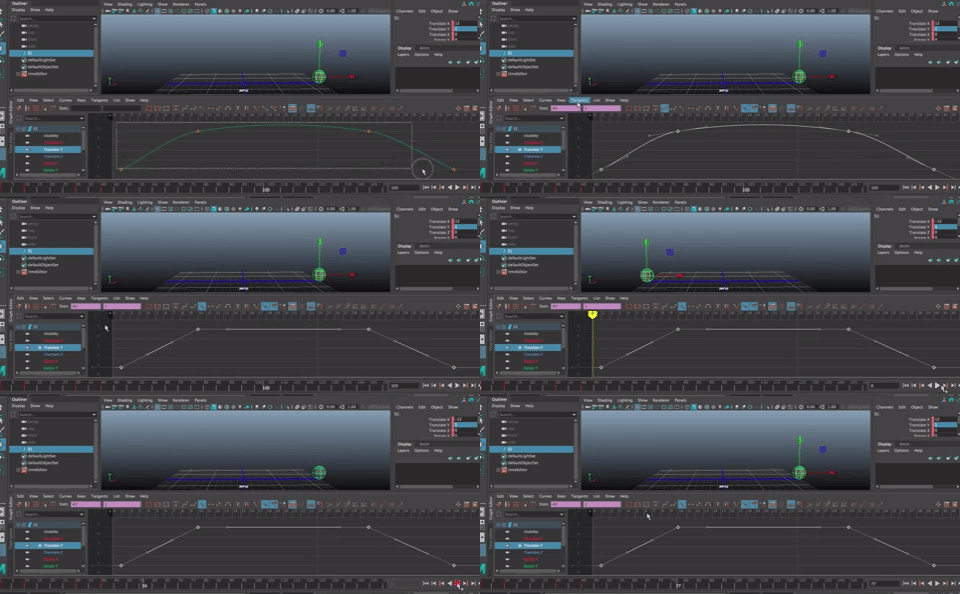
With straight lines between each key (a linear interpolation) the movement is very robotic. There is no acceleration or deceleration.
Select teh curve again and change the tangent type to Clamped.
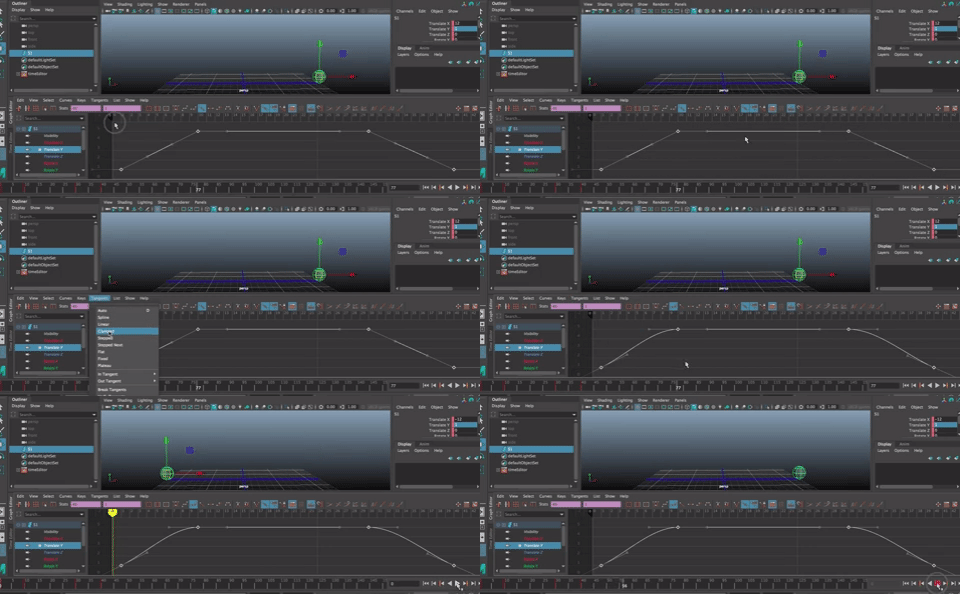
A clamped tangent is usually the default tangent type. It has a spline curve going into each key and a linear going out of each key.
As a general rule to remember, the steeper the line between keys, the faster the change is.
To see this clearly, Select the curve and choose a Stepped Tangent
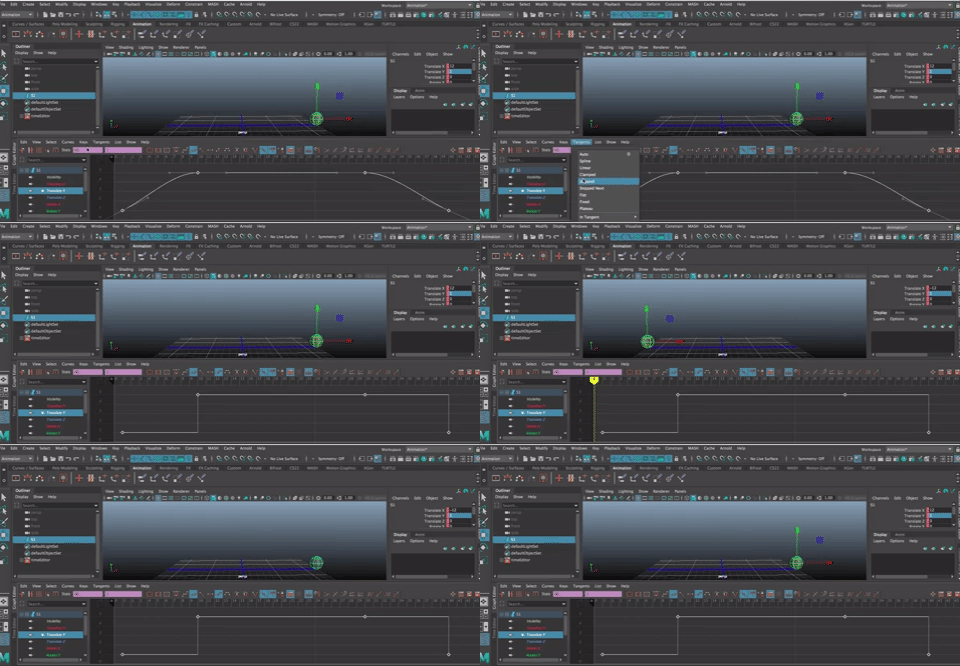
A stepped tangent holds the value of the after the key and then jumps instantaneously to the next key.
This shows how a straight curve between keys is no change and a vertical change between keys is instantaneous and a sloped line is something in between.
A Stepped Next tangent change the value to the next value as after the key and holds it until the next key.
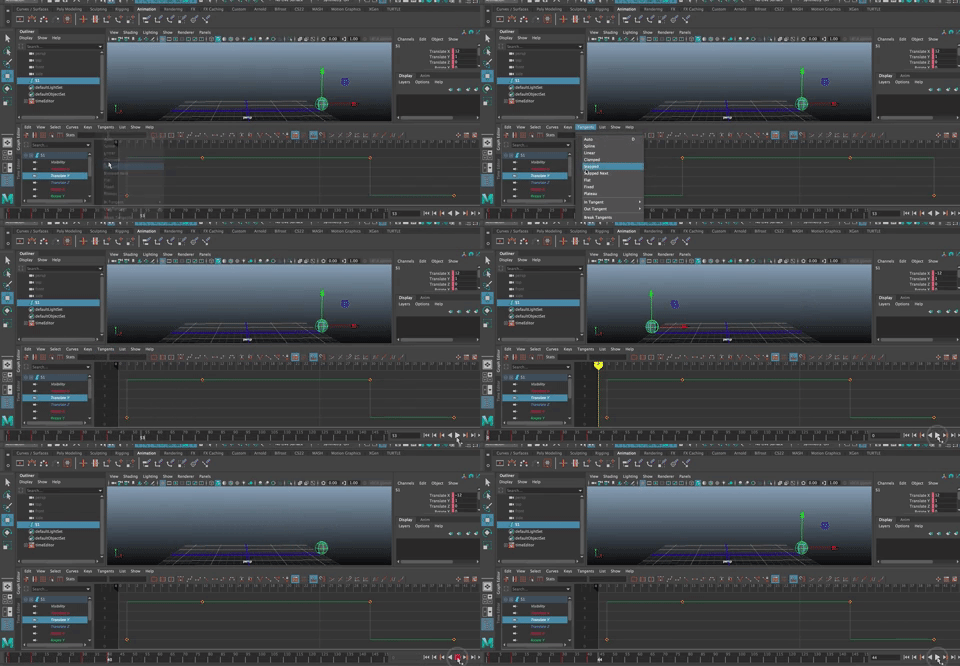
Try the other tangents, but these are the ones you will mostly use.
Change the tangent type back to Auto or Clamped (they are the same in this case)
Make the ball bounce
We want the ball to bounce. Let's put a key frame at frame 20, for Translate Y, at a value of 0.
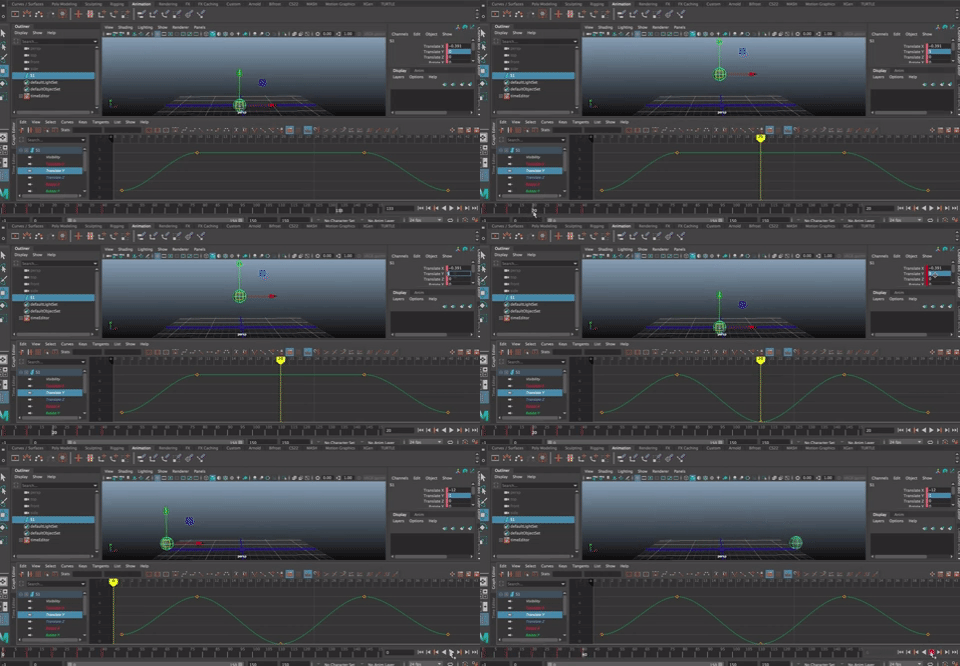
The ball bounces, but the movement isn't really "bouncy". Let's fix it using the tangent handles.
Tangent Handles
If you select a key in the Graph Editor, you see a tangent handle.
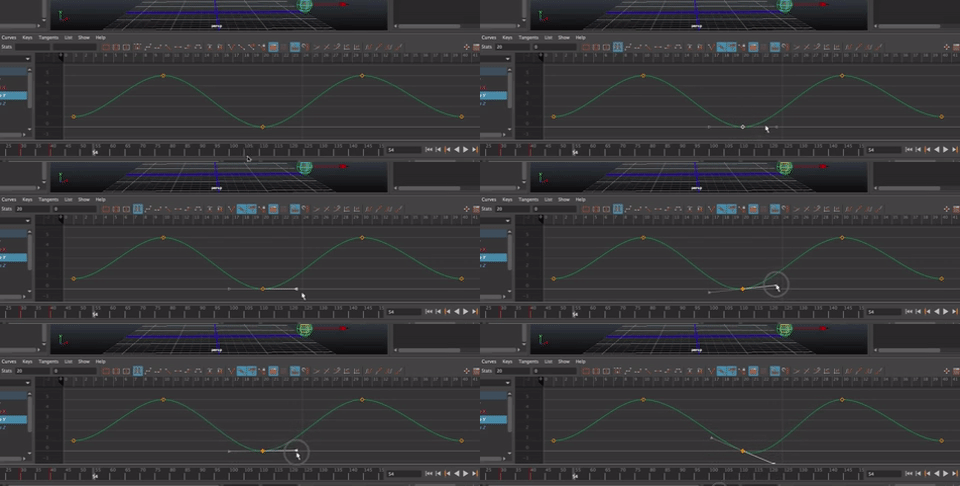
Select one side or the other and, with the Move tool selected, move the tangent handle up and down to change the slope of the curve.
In a bounce, you want the curve coming into and out of the "bounce" key to be a big slope to create the feel of the bounce.
But tangent handles change together.
To fix it, you have to Break the Tangent.
Under Tangent, choose Break Handle.
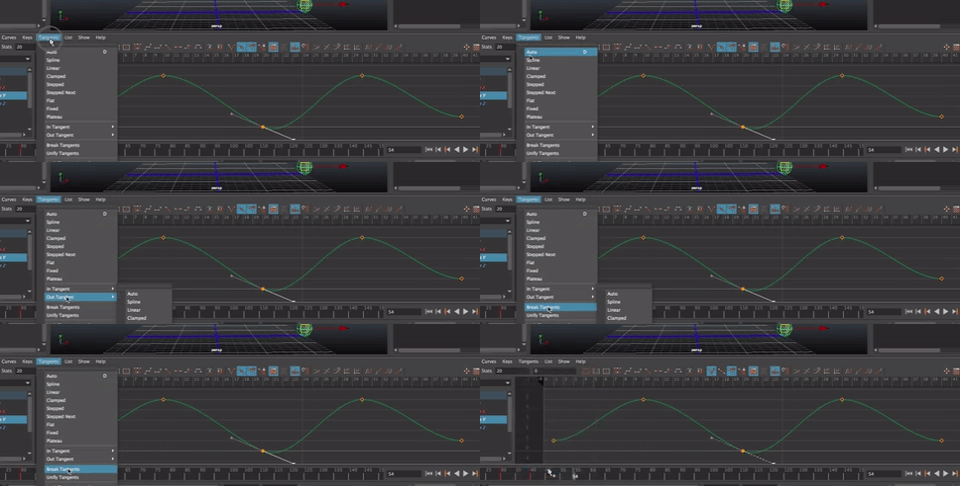
Then you can move each handle separately.
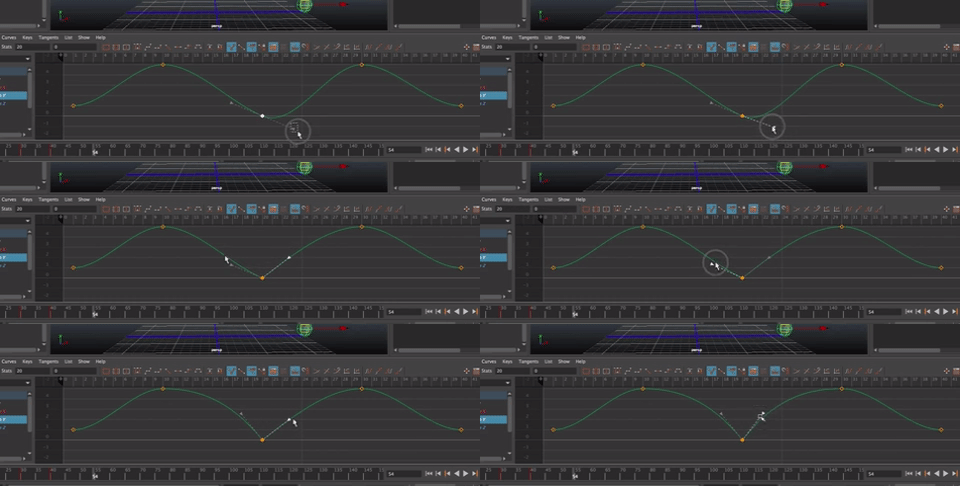
And you can see the result.
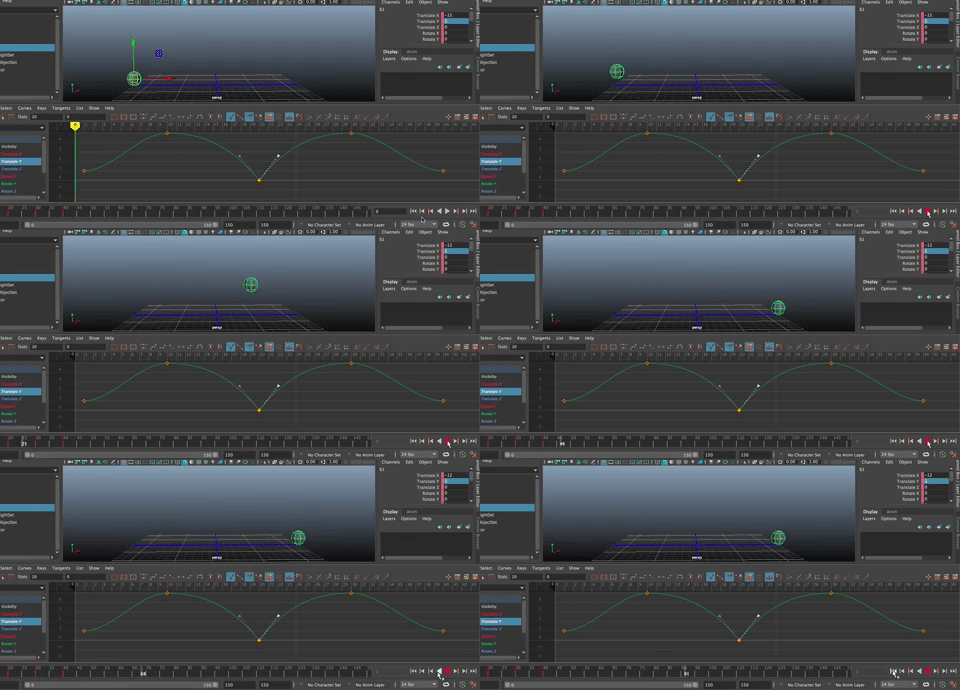
Some tricks for moving and editing keys
Once you animated your scene, you may want to make some changes to the timing. Your tendency may be to add more keys, but a better way to do it is to change the tangents and/or edit where the keys are in time.
Here are some tips for doing that.
To move a single frame in the time slider:
- Shift + MMB drag across a red key tick mark
- Use the arrows to drag the key to another frame

To move two or more key frames in the time slider
- Shift + MMB drag across two or more red key tick marks
- Use one of the inner arrows to move the keys to a new spot on the timeline without changing the time between those keys

- Use one of the outer arrows to expand or contract the number of frames between the keys you've highlighted

To delete a Key
- Right click on the key in the timeline
- Select delete
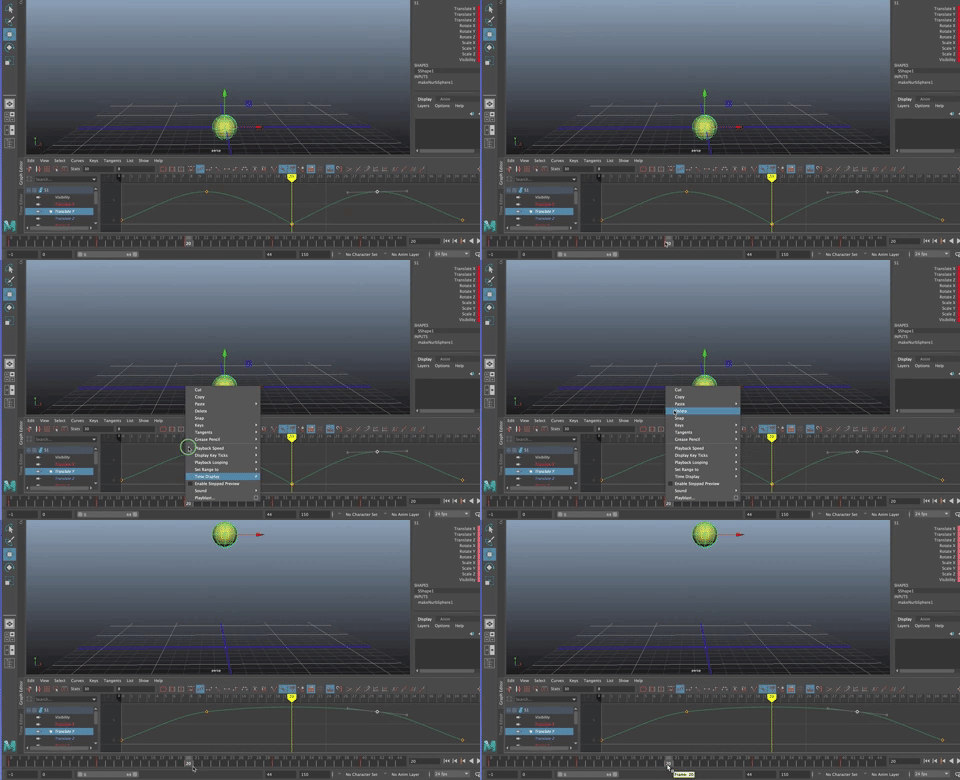
To copy a key from one frame to another
- Right click on the key in the timeline
- Select copy
- Go to the frame you want to copy to
- Right click and select Paste>Paste
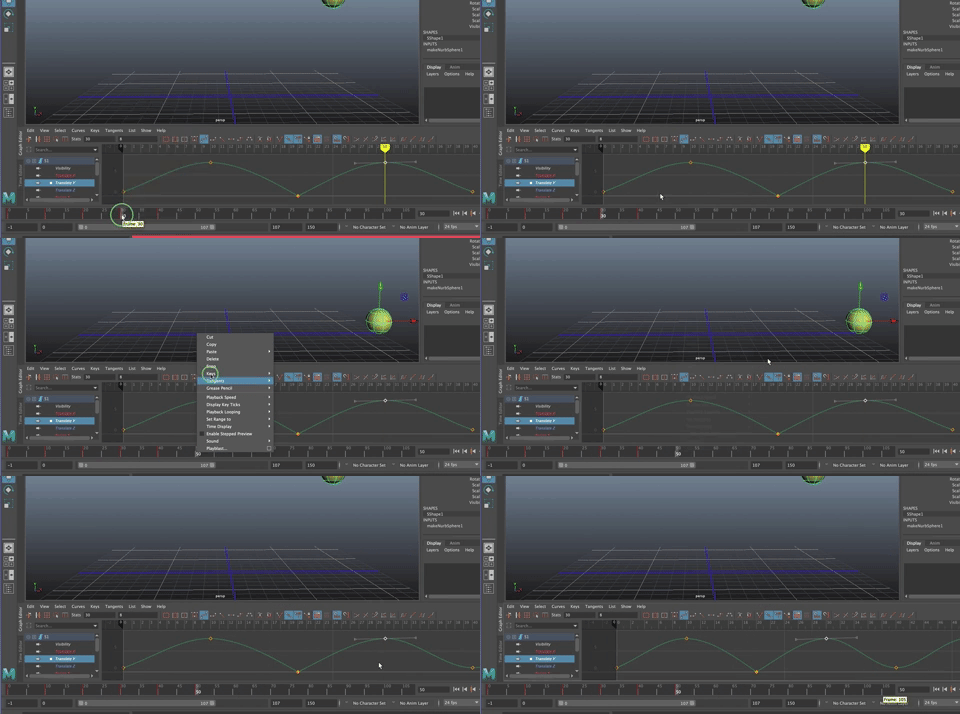
Animating your Character
When you animate your character, you set a key frame on the controller - not the joint or the geometry, in most cases, that is.
Remember, unless you have a character set, you need to key every control separately.
To make it possible to set keys on all the controls at one time, use Character Sets or marquee select all the controls.
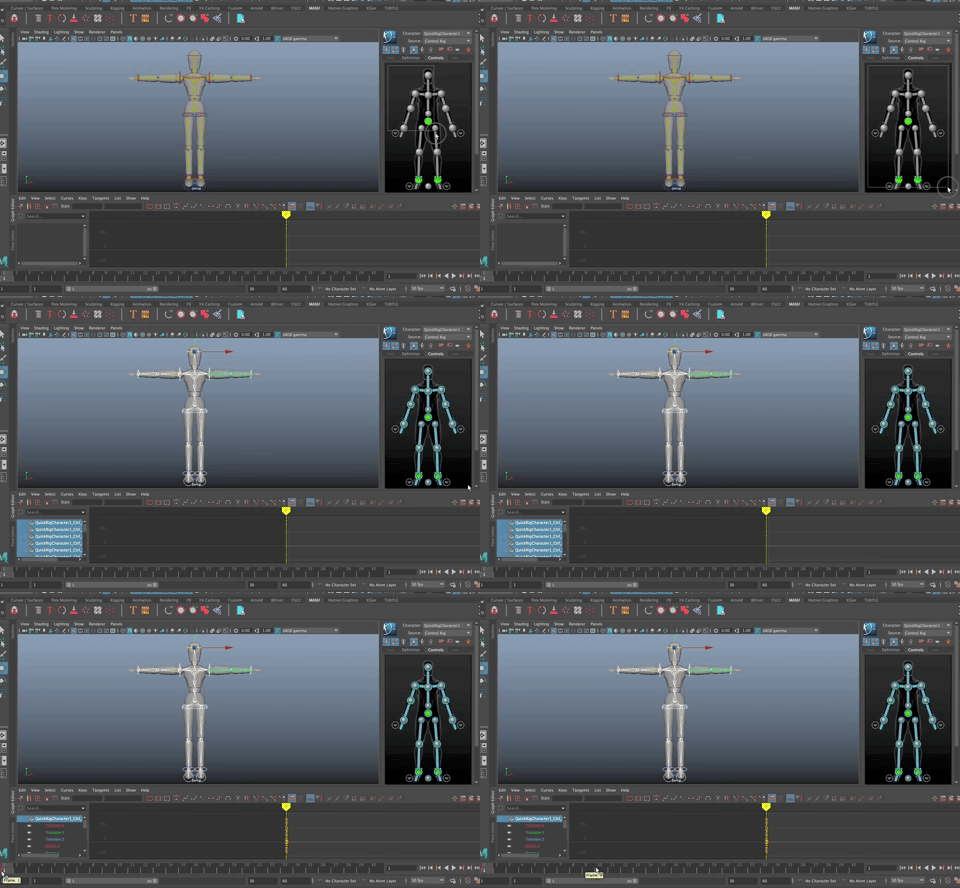
Character sets are done one way in HumanIK and QuickRig characters. For other characters, I have instructions below, for making Character Sets and SubCharacter Sets.
HumanIK and QuickRig Keys.
To set keys in HumanIK and Quick Rigged characters, you use the HumanIK window.
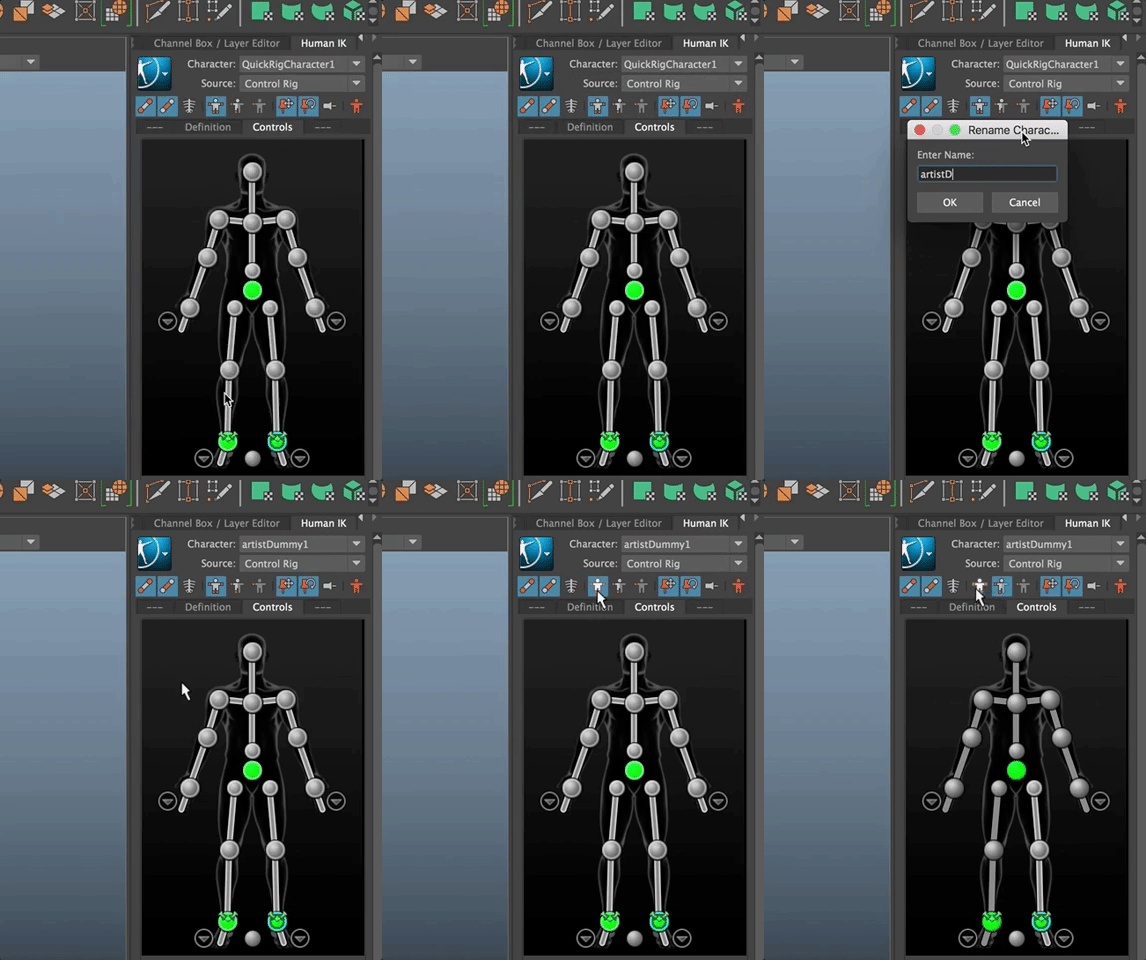
Click in the arrow in the blue HumanIK window on the upper left. Rename the character.
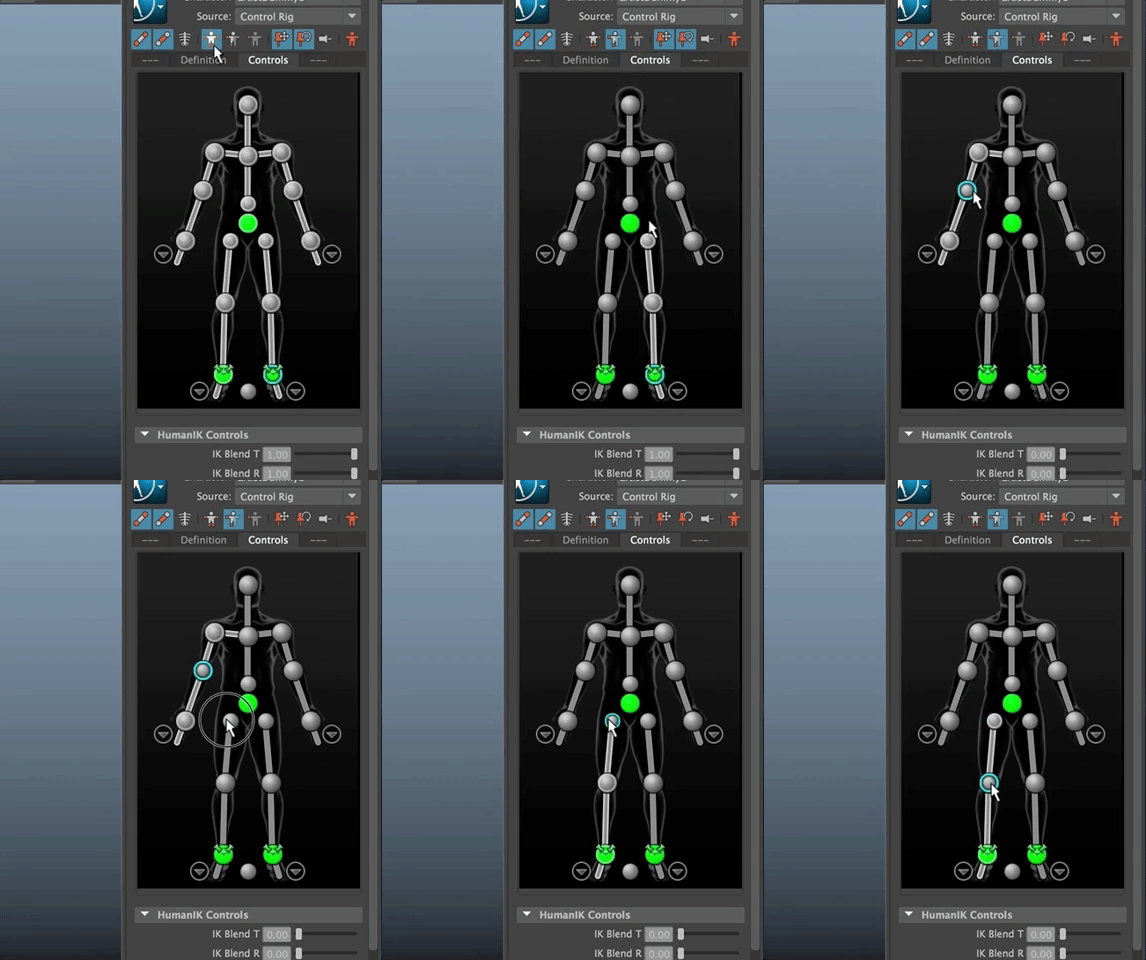
There are two icons to the right of the skeleton icon. One selects the full character's controls, the other lets you select controls individually.
To choose controls individually, you select the controls on the human model by clicking on it.
To start, it is a good idea to set the character into the starting pose on frame on, Select the icon for the entire character, hit "s". If you find that isn't working, marquee select all the controls.
 and hit "s"
Go to another frame, move the controls, hit "s".
It creates a lot of keys if you always key every attribute. Selecting by individual control can be useful to avoid too many keys.
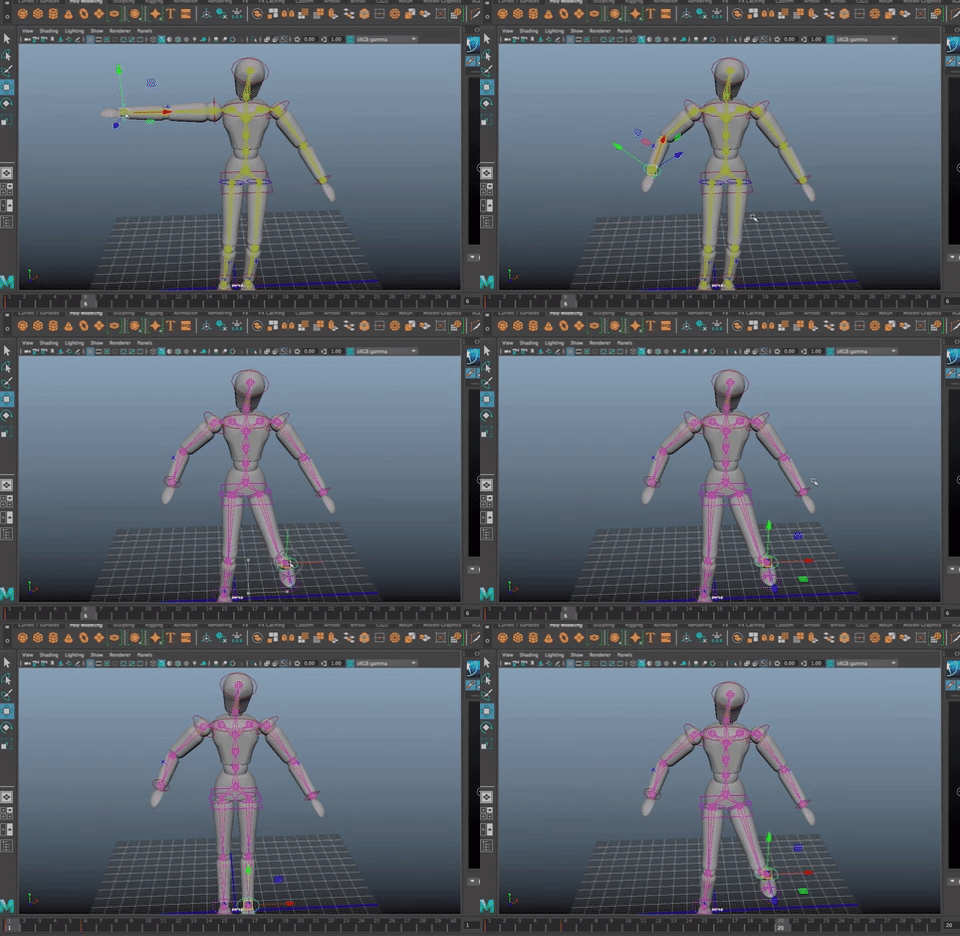
Auto Key
If hitting "s" is hard to remember, you can use the Auto Key option.
Selet the Auto Key Toggle to the right of the Playback Range Slider.
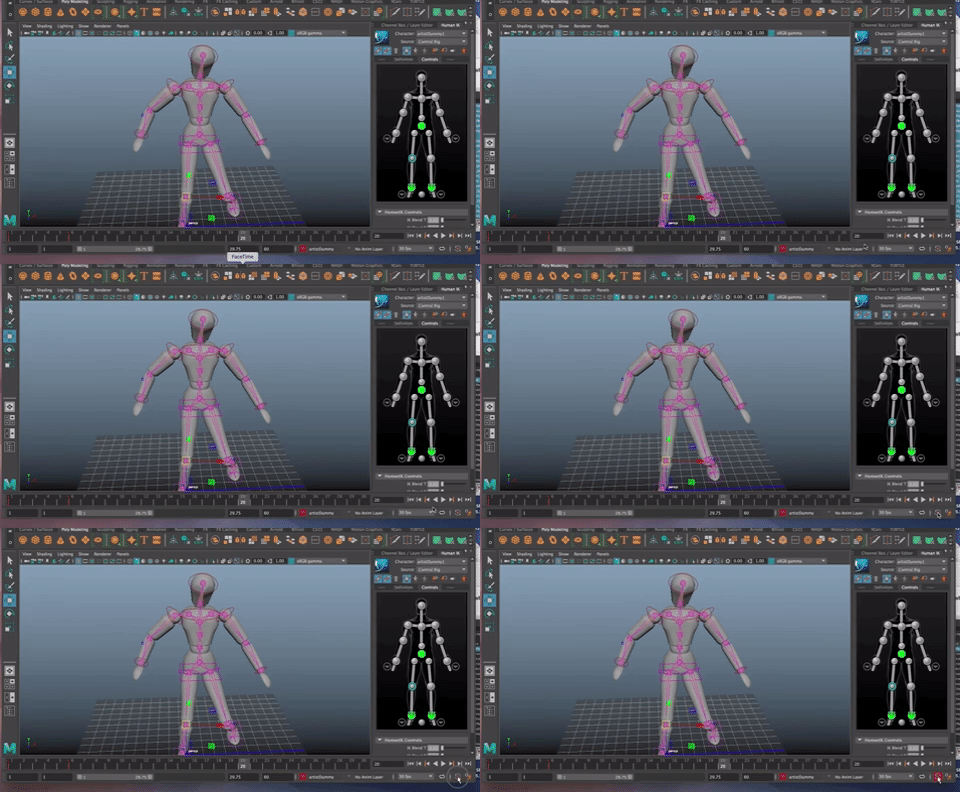
Be sure you are in FULL Character selection mode.

Then go to whatever frame you want, move any control, and it will automatically set a key.
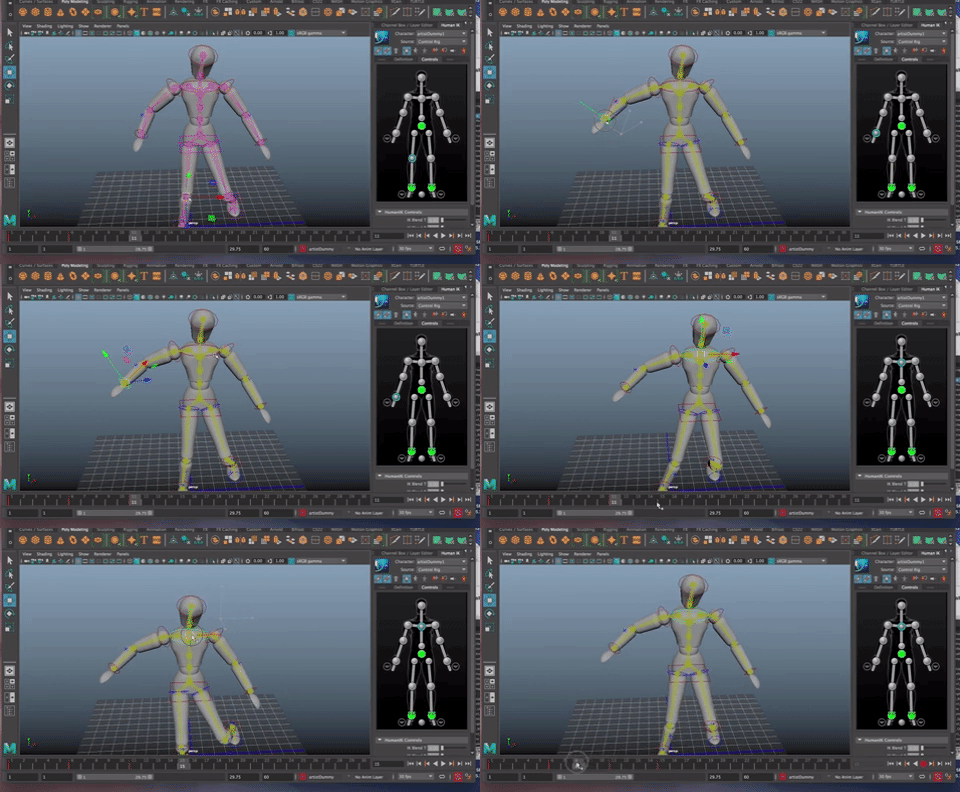
AutoKey sets a key on any changes you make automatically.
It's easy, but do be careful, because you can easily over-ride a key you liked by moving something in that frame.
Character Sets
Character Sets and Sub-Character Sets are ways to allow an animator to set a key on multiple objects or controls and attribute values at one time.
It is straight forward to set up a Character Set, especially if you have a control for each joint.
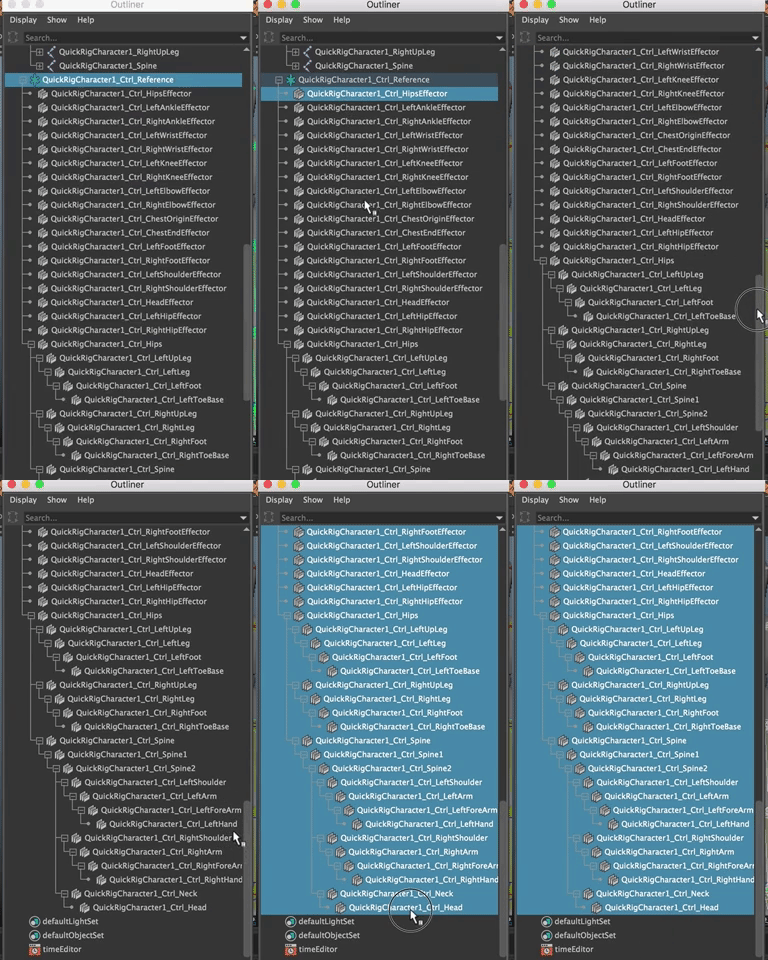
In the Outliner, shift select all the controls for the character.
Then, in the Animation Module, go to Key>Create Character Set>Options Box
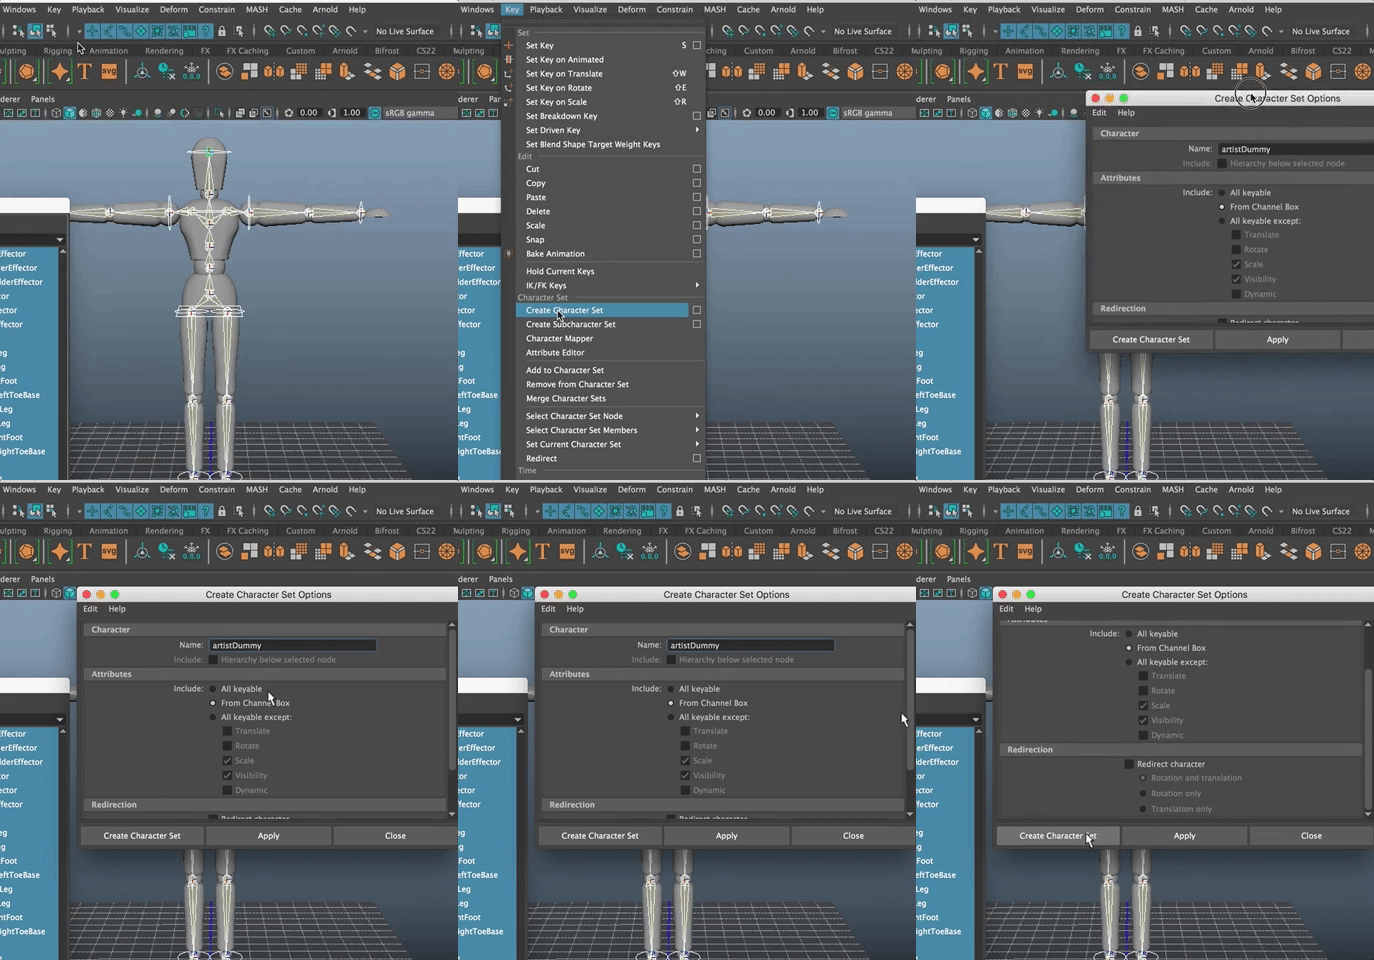
Name Your Character Set
The default settings are fine, unless you want to animate scale or visibility. In that case, I like to choose either All Keyable (easiest) or Channel Box (if you are sure your Channel Box is set up correctly).
The hit Create Character Set.
You will notice the Character Set to the right of the Playback Range Slider.

When the Character Set is active, everytime you hit "s" it sets a key on every control for every keyable attribute or every attribute in the Channel Box or the Default
Sub-Character Sets
Sub-Character Sets are helpful if you want to key the lower body separately from the upper body. You would follow the same instructions as above
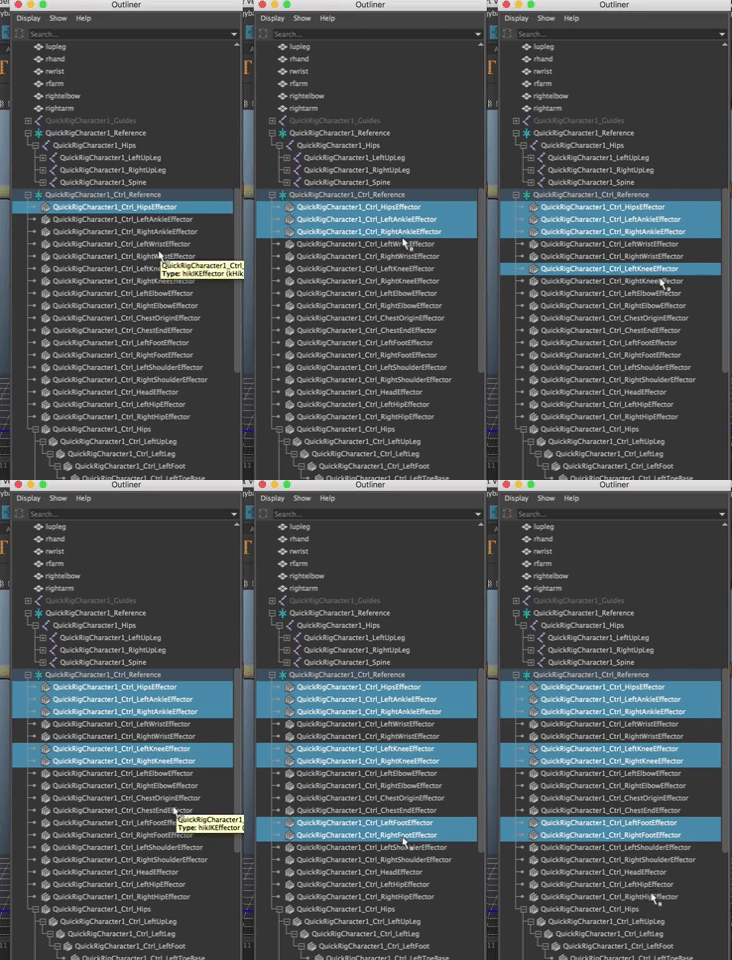
But only choose a sub-set of the controls that fit the Sub-Character you want to create. In this case, I want to find all the hip, knee, leg and foot controls for both the right and left side of the body.
Go to Key>Create Sub-Character Set>Option Box
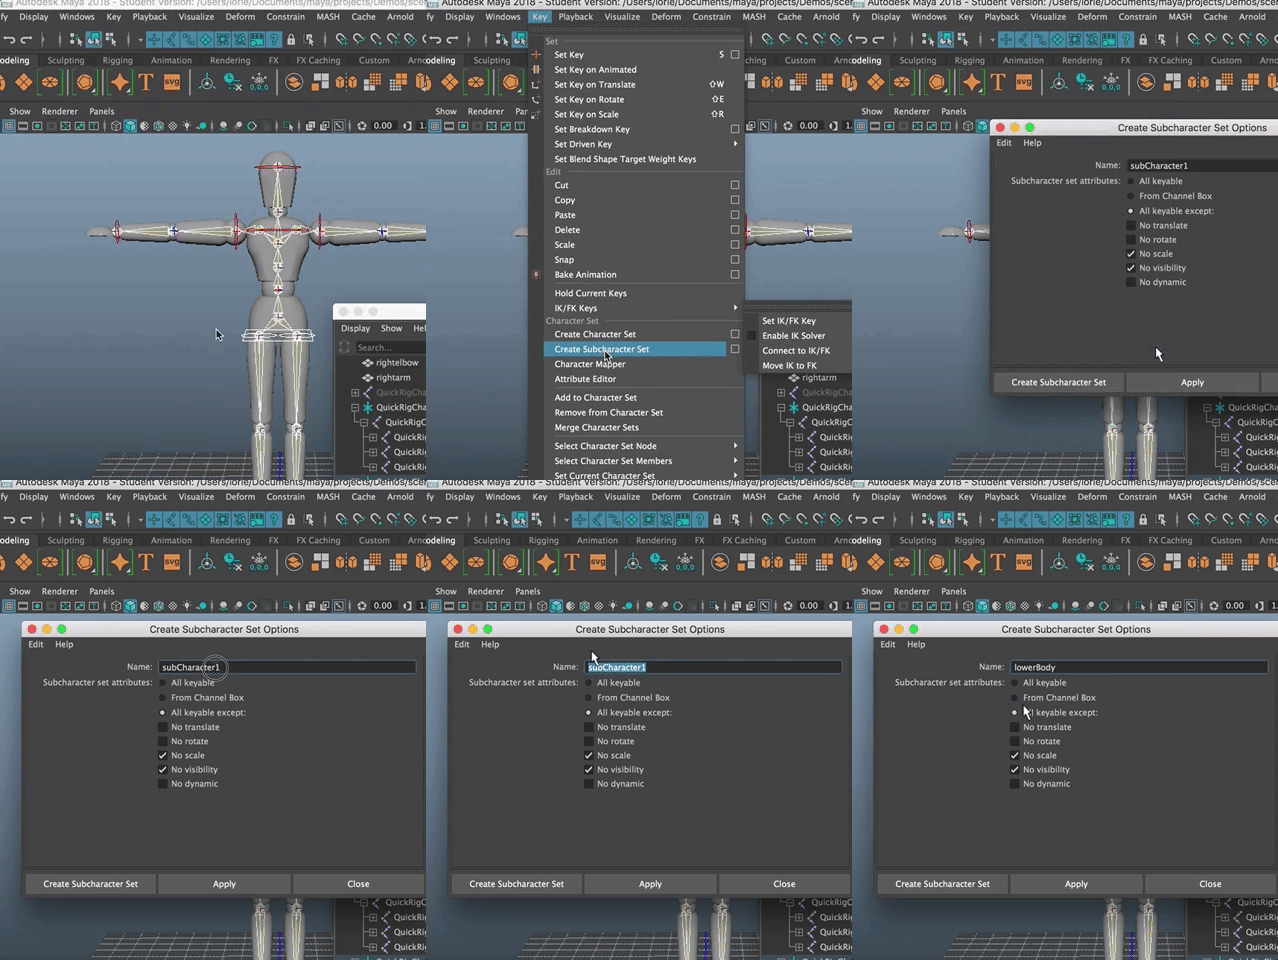
Now you will have both a Character Set and a subset. You can have as many sub-characters as you want to.

Again, you can have as many sub-character sets as you want, and if you go to NONE in the character set section by the Range Slider, you can set keys on controls individually, too.